WildTrak gets Winch & ARB Bumpers

Kenneth
Aug 23, 2024

KCsBronco

Aug 23, 2024

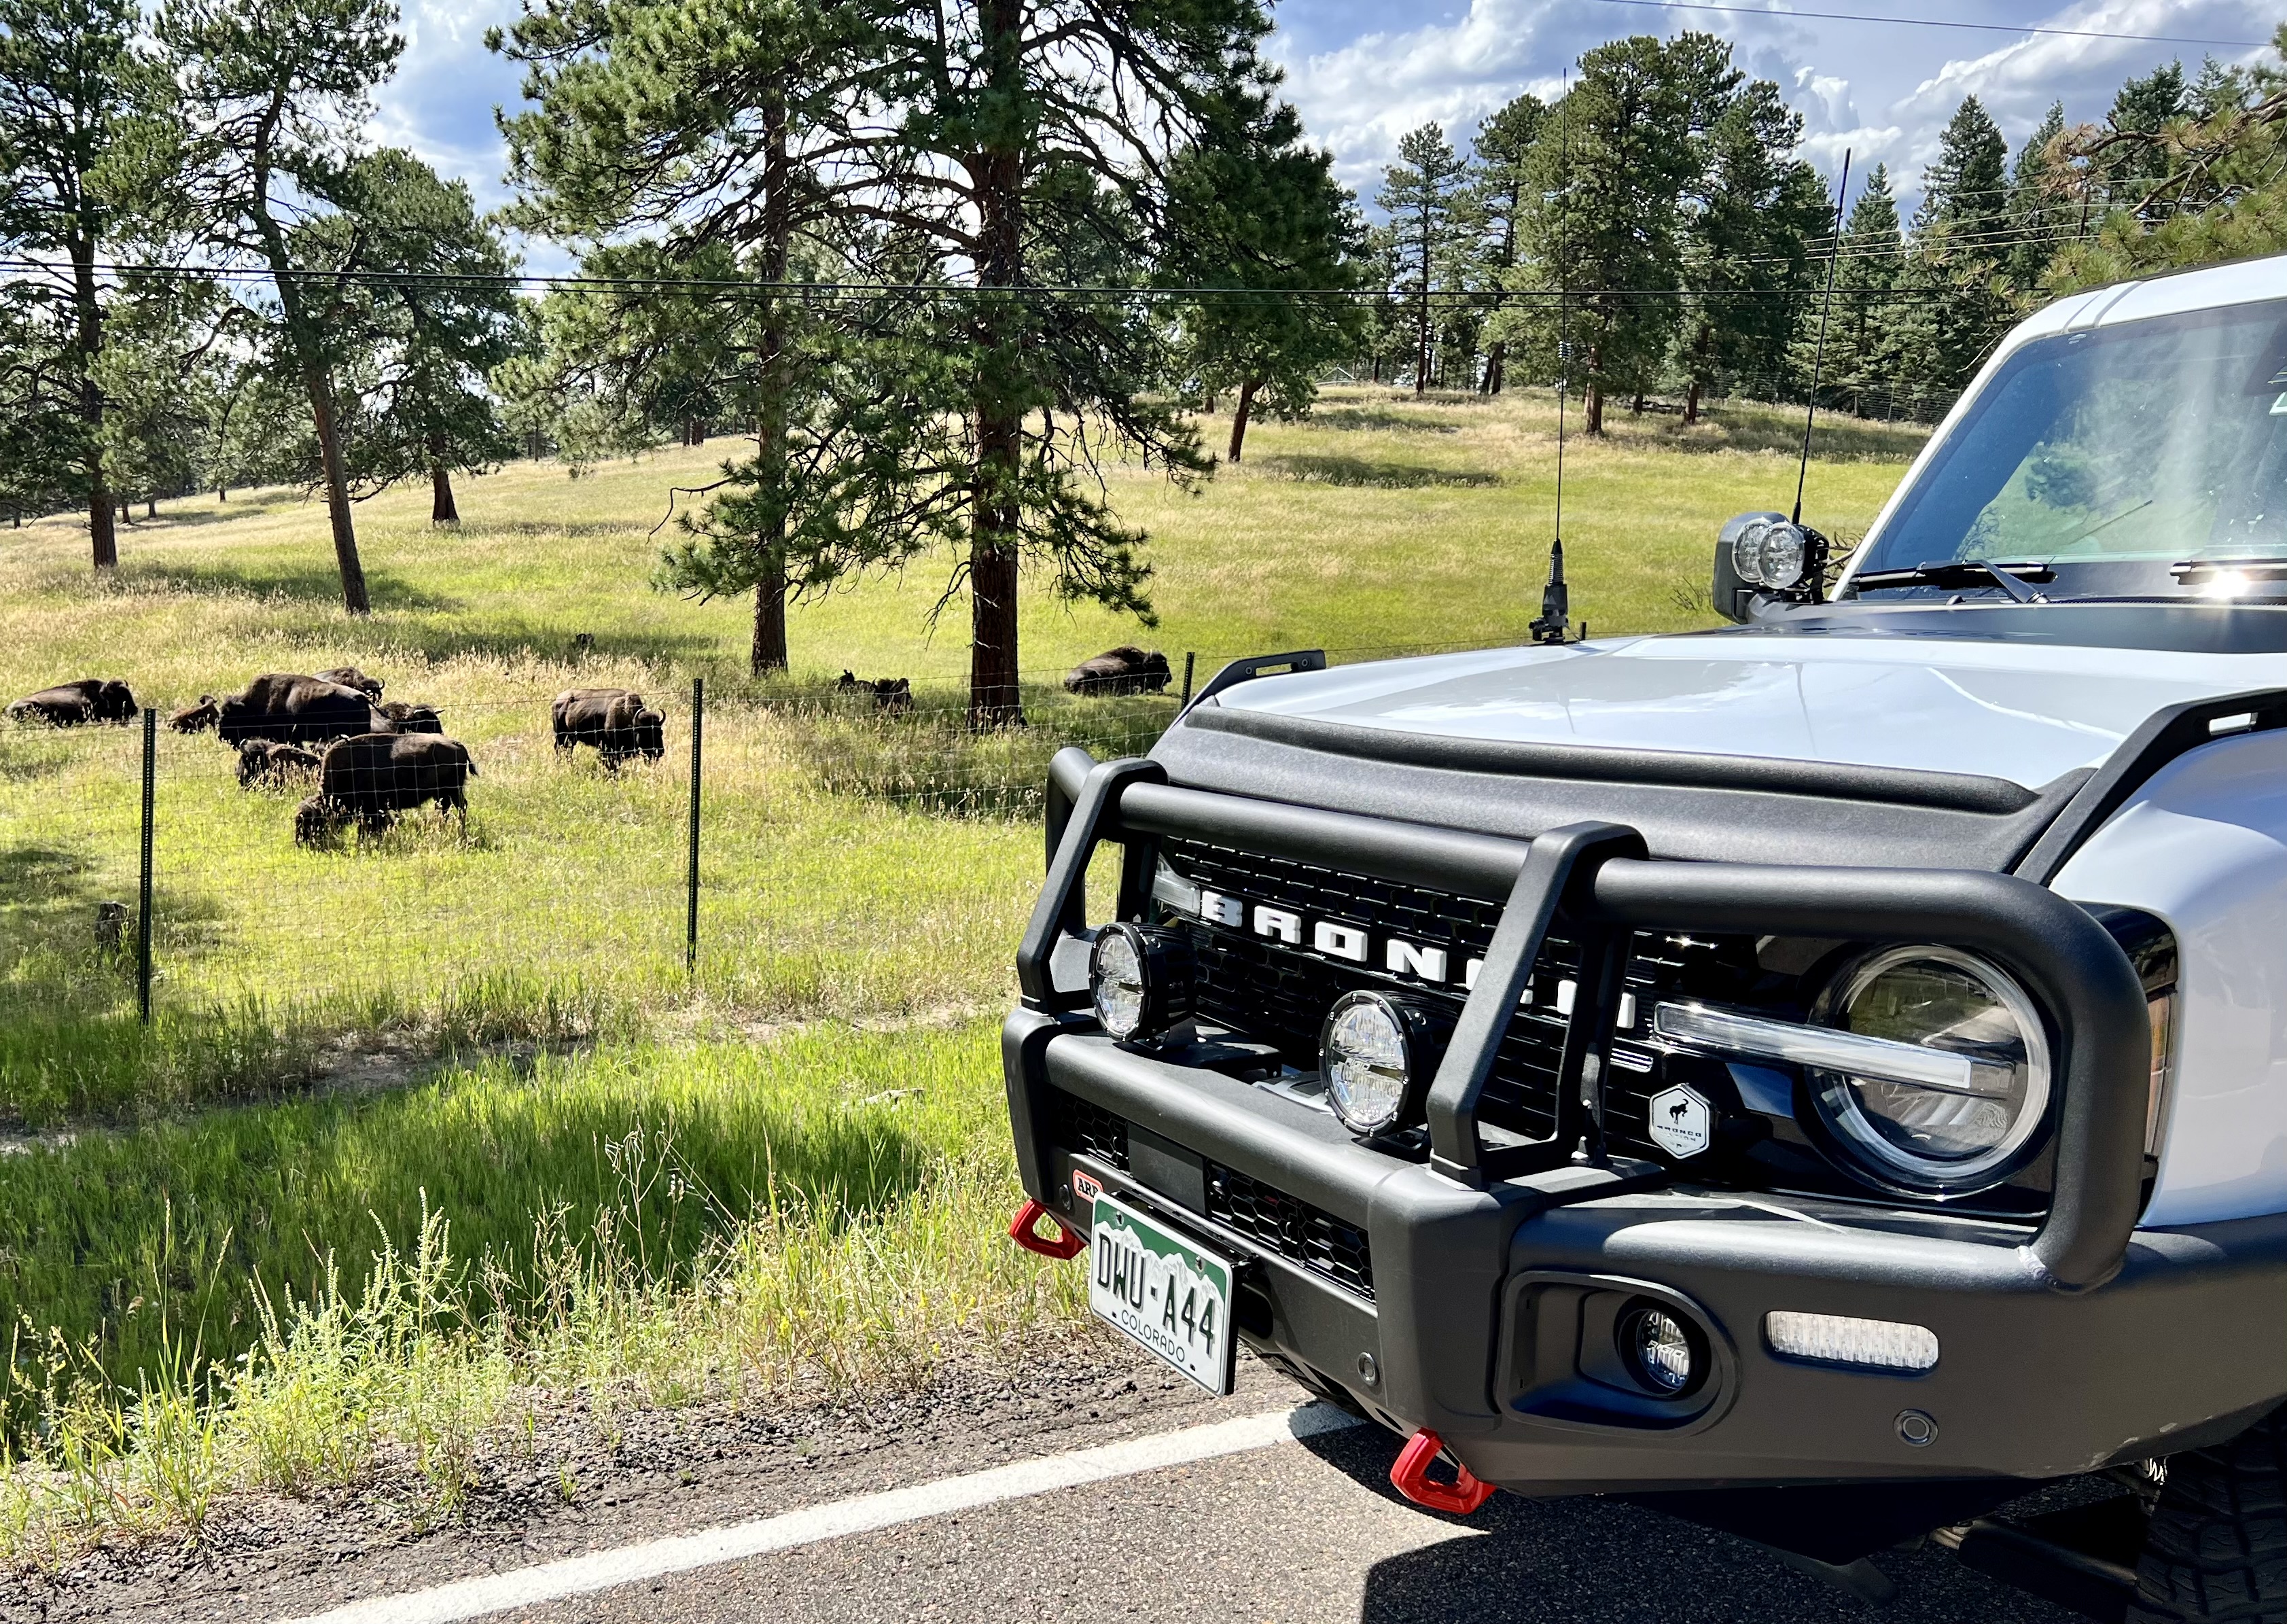
We took advantage of ARB's $99 shipping promo for their Summit and Rear bumpers. Of course, mounting a winch and bumper lights became 'scope creep' additions to this summertime project.

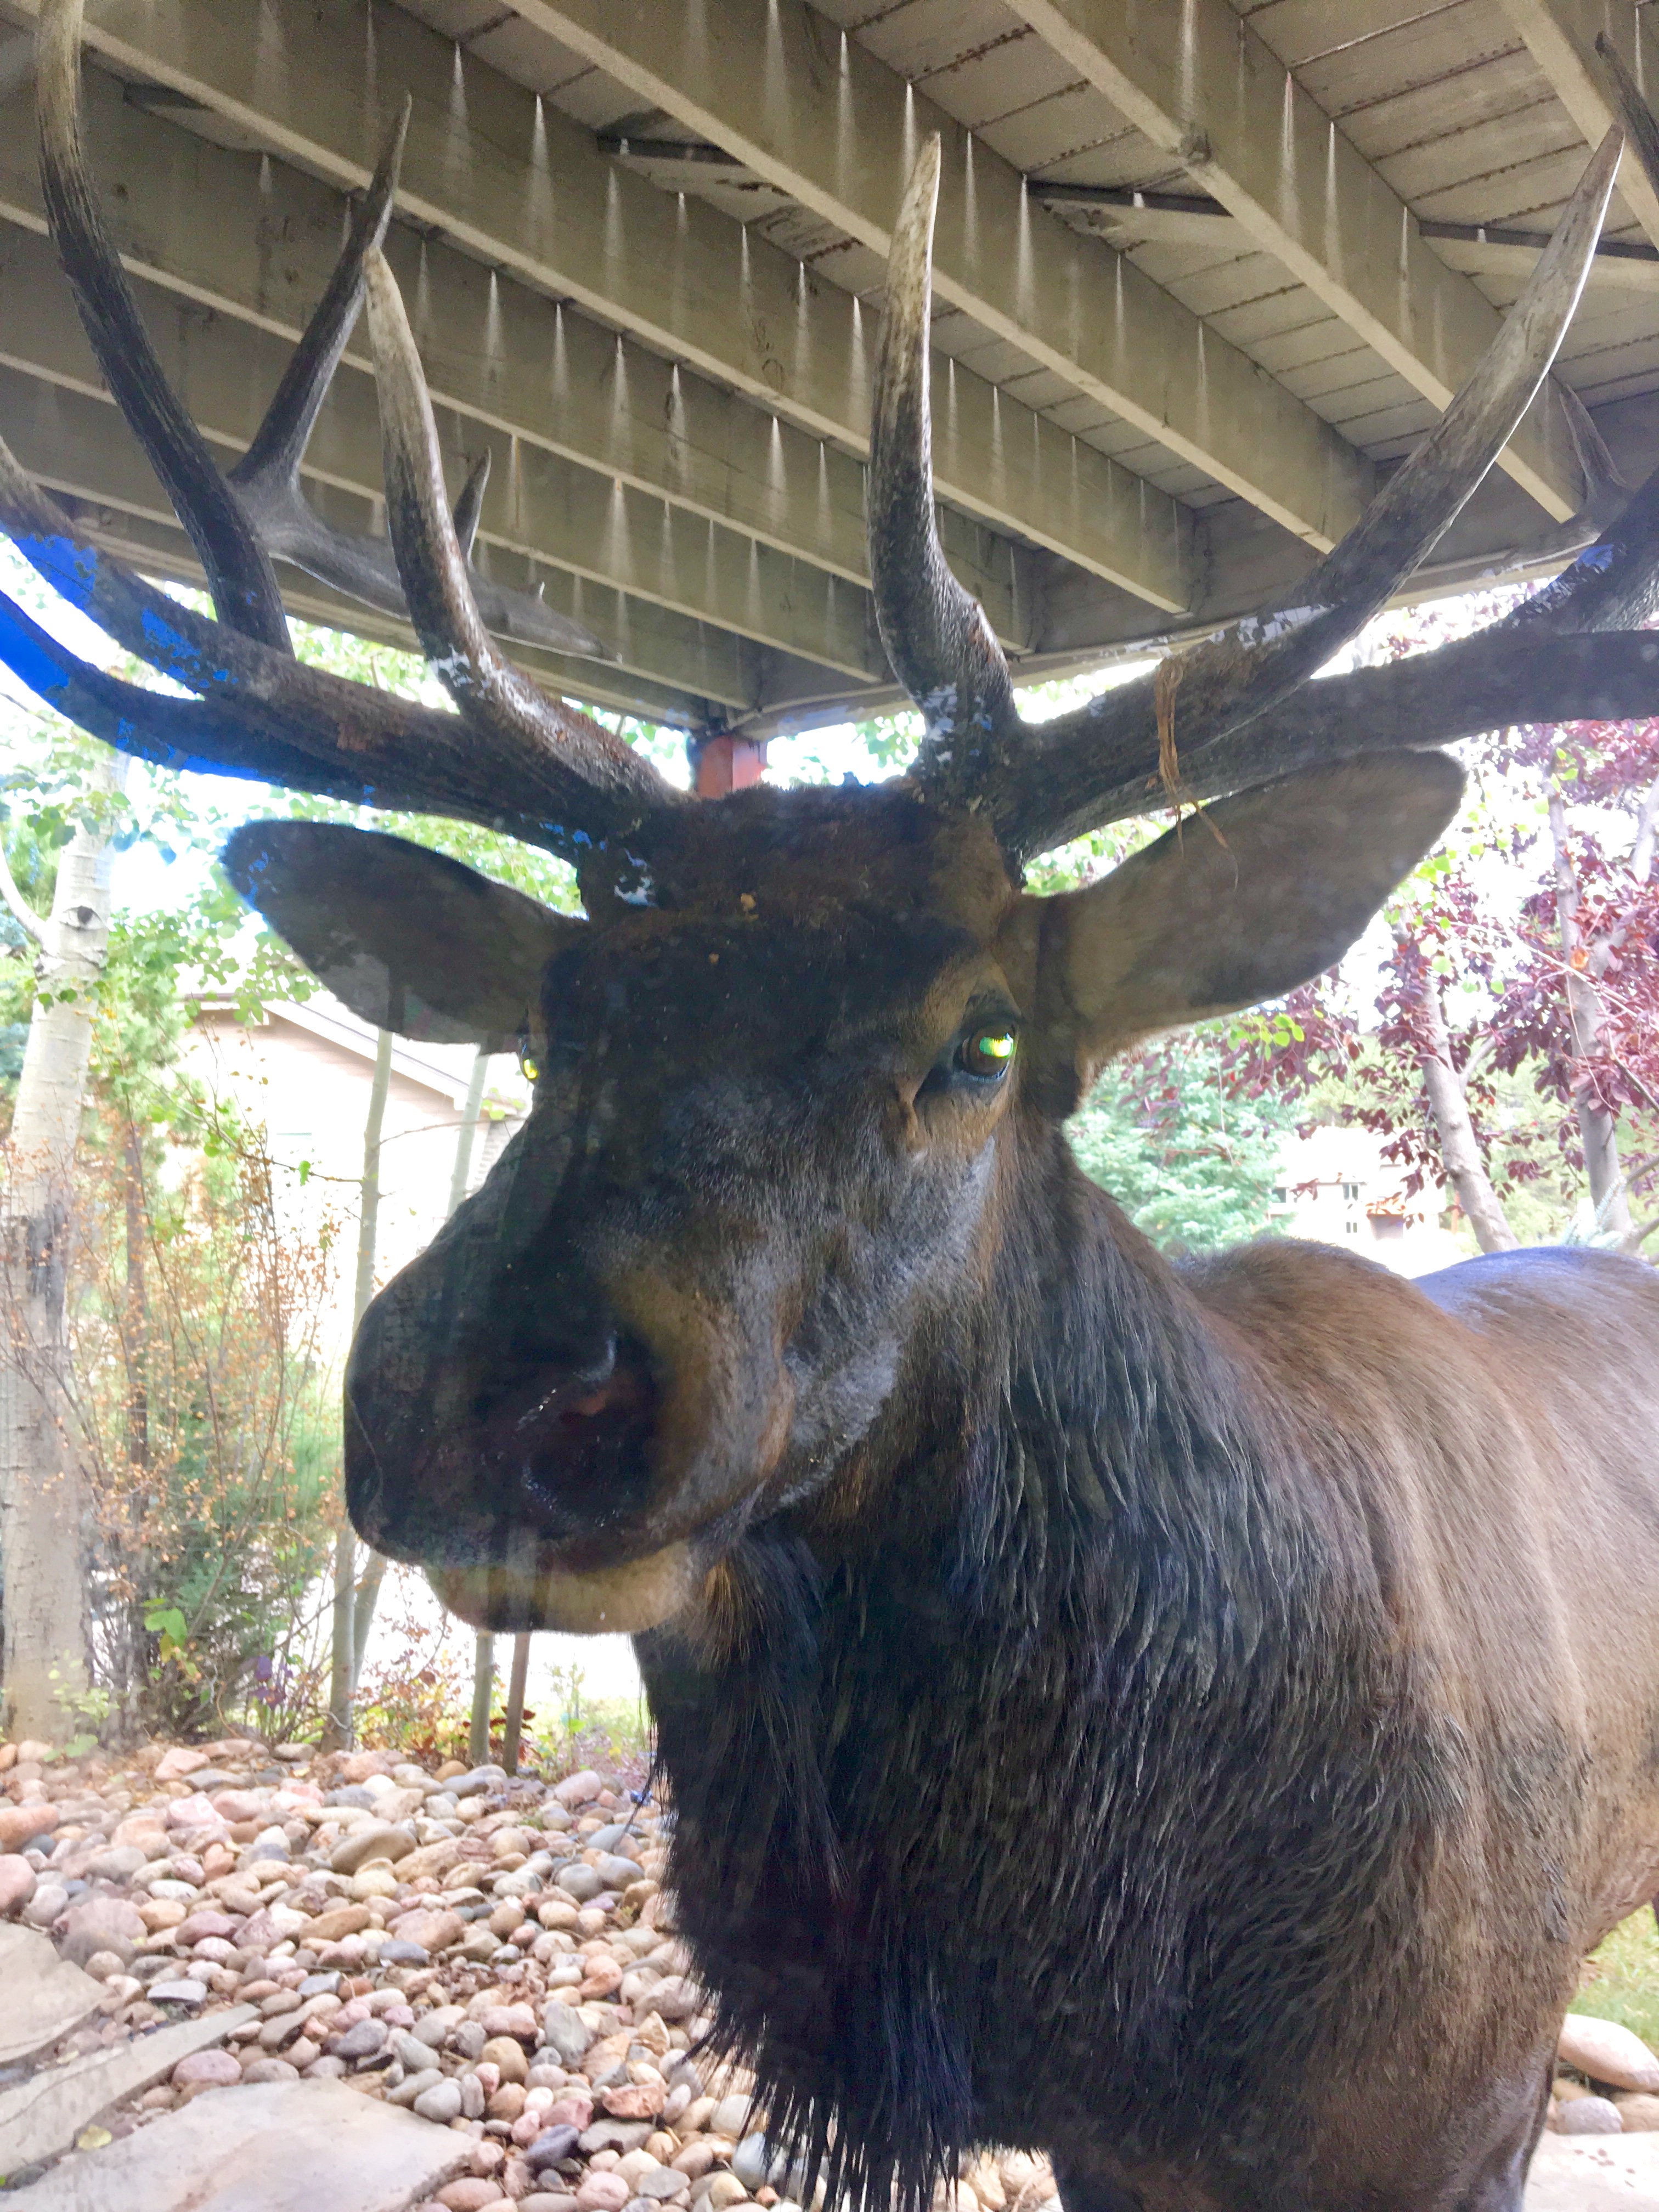
Why ARB's bumpers? We live in Colorado's foothills west of Denver and frequently share the roads with some pretty big critters. Too often, there are vehicle/animal collisions and hitting a 600-700lb bull elk at 60+mph - Doesn't end well!

For decades, ARB's Australian home base product development has focused on survivability of vehicle crashes with kangaroos which are prolithic there. These 'Roos' size are probably more comparable to our mule deer which are on our roads in numbers too. So, we felt ARB bumper's robust build offers unique safety features placing this Aussie on our short list.

Another ARB plus is their accessory relationship with Ford. We don't have the details, but talking to other Bronco bumper after market providers, ARB's product development apparently has certain advantages over other sellers. Heck, one truck/off-roading bumper specialist told me Ford 'won't even return their phone calls'.

It's our theory that this Ford/ARB 'approved accessory' arrangement results in ARB's better fitment, airflow, engine & tranny cooling, and compatabily with safety & other features like airbag, radar sensors, cameras, etc. For sure, I can confirm installing ARB bumpers is FAR more that a 'bolt-on' project. Heck, I've sent 3 or 4 hours daily over couple weeks feeling like I've re-built our Bronco installing these things!

For perspective, ARB's bumpers 'Fitting Instructions' are 49 pages, detailing 146 individual tasks and almost 2 1/2 pages of Parts Listing.

If you're interested in getting 'down 'n dirty', here're some pics. First, several tips:

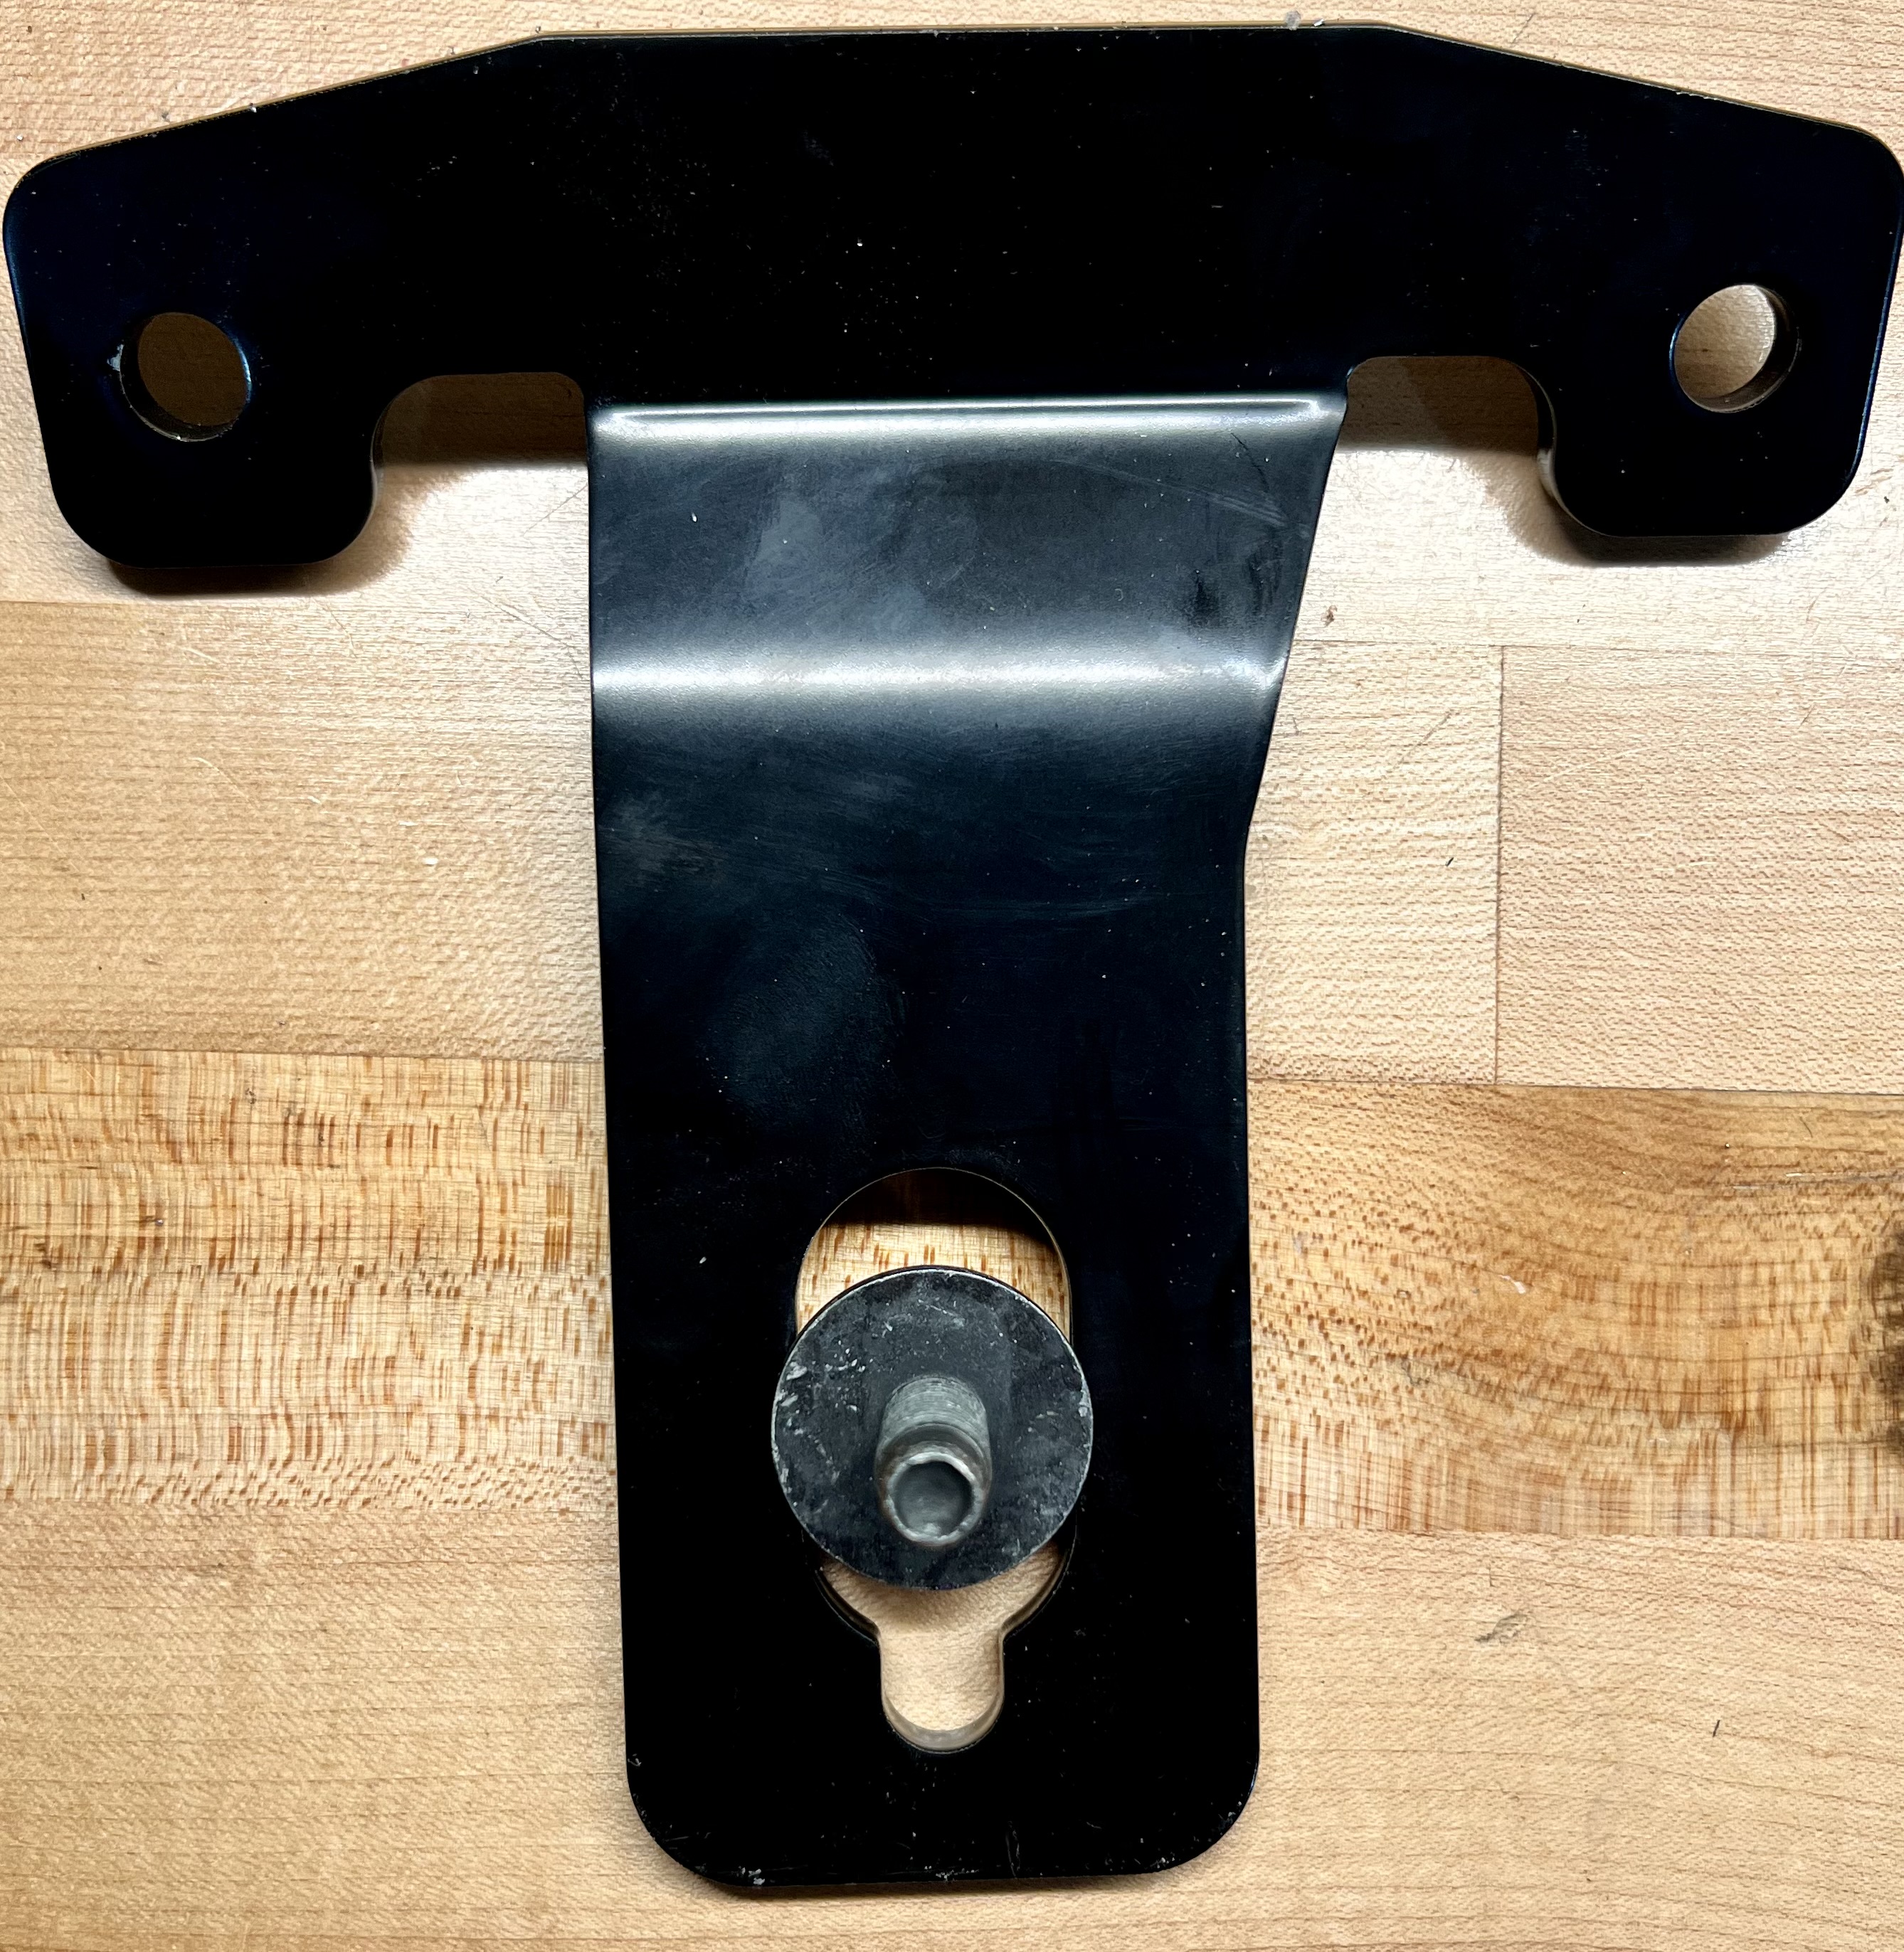
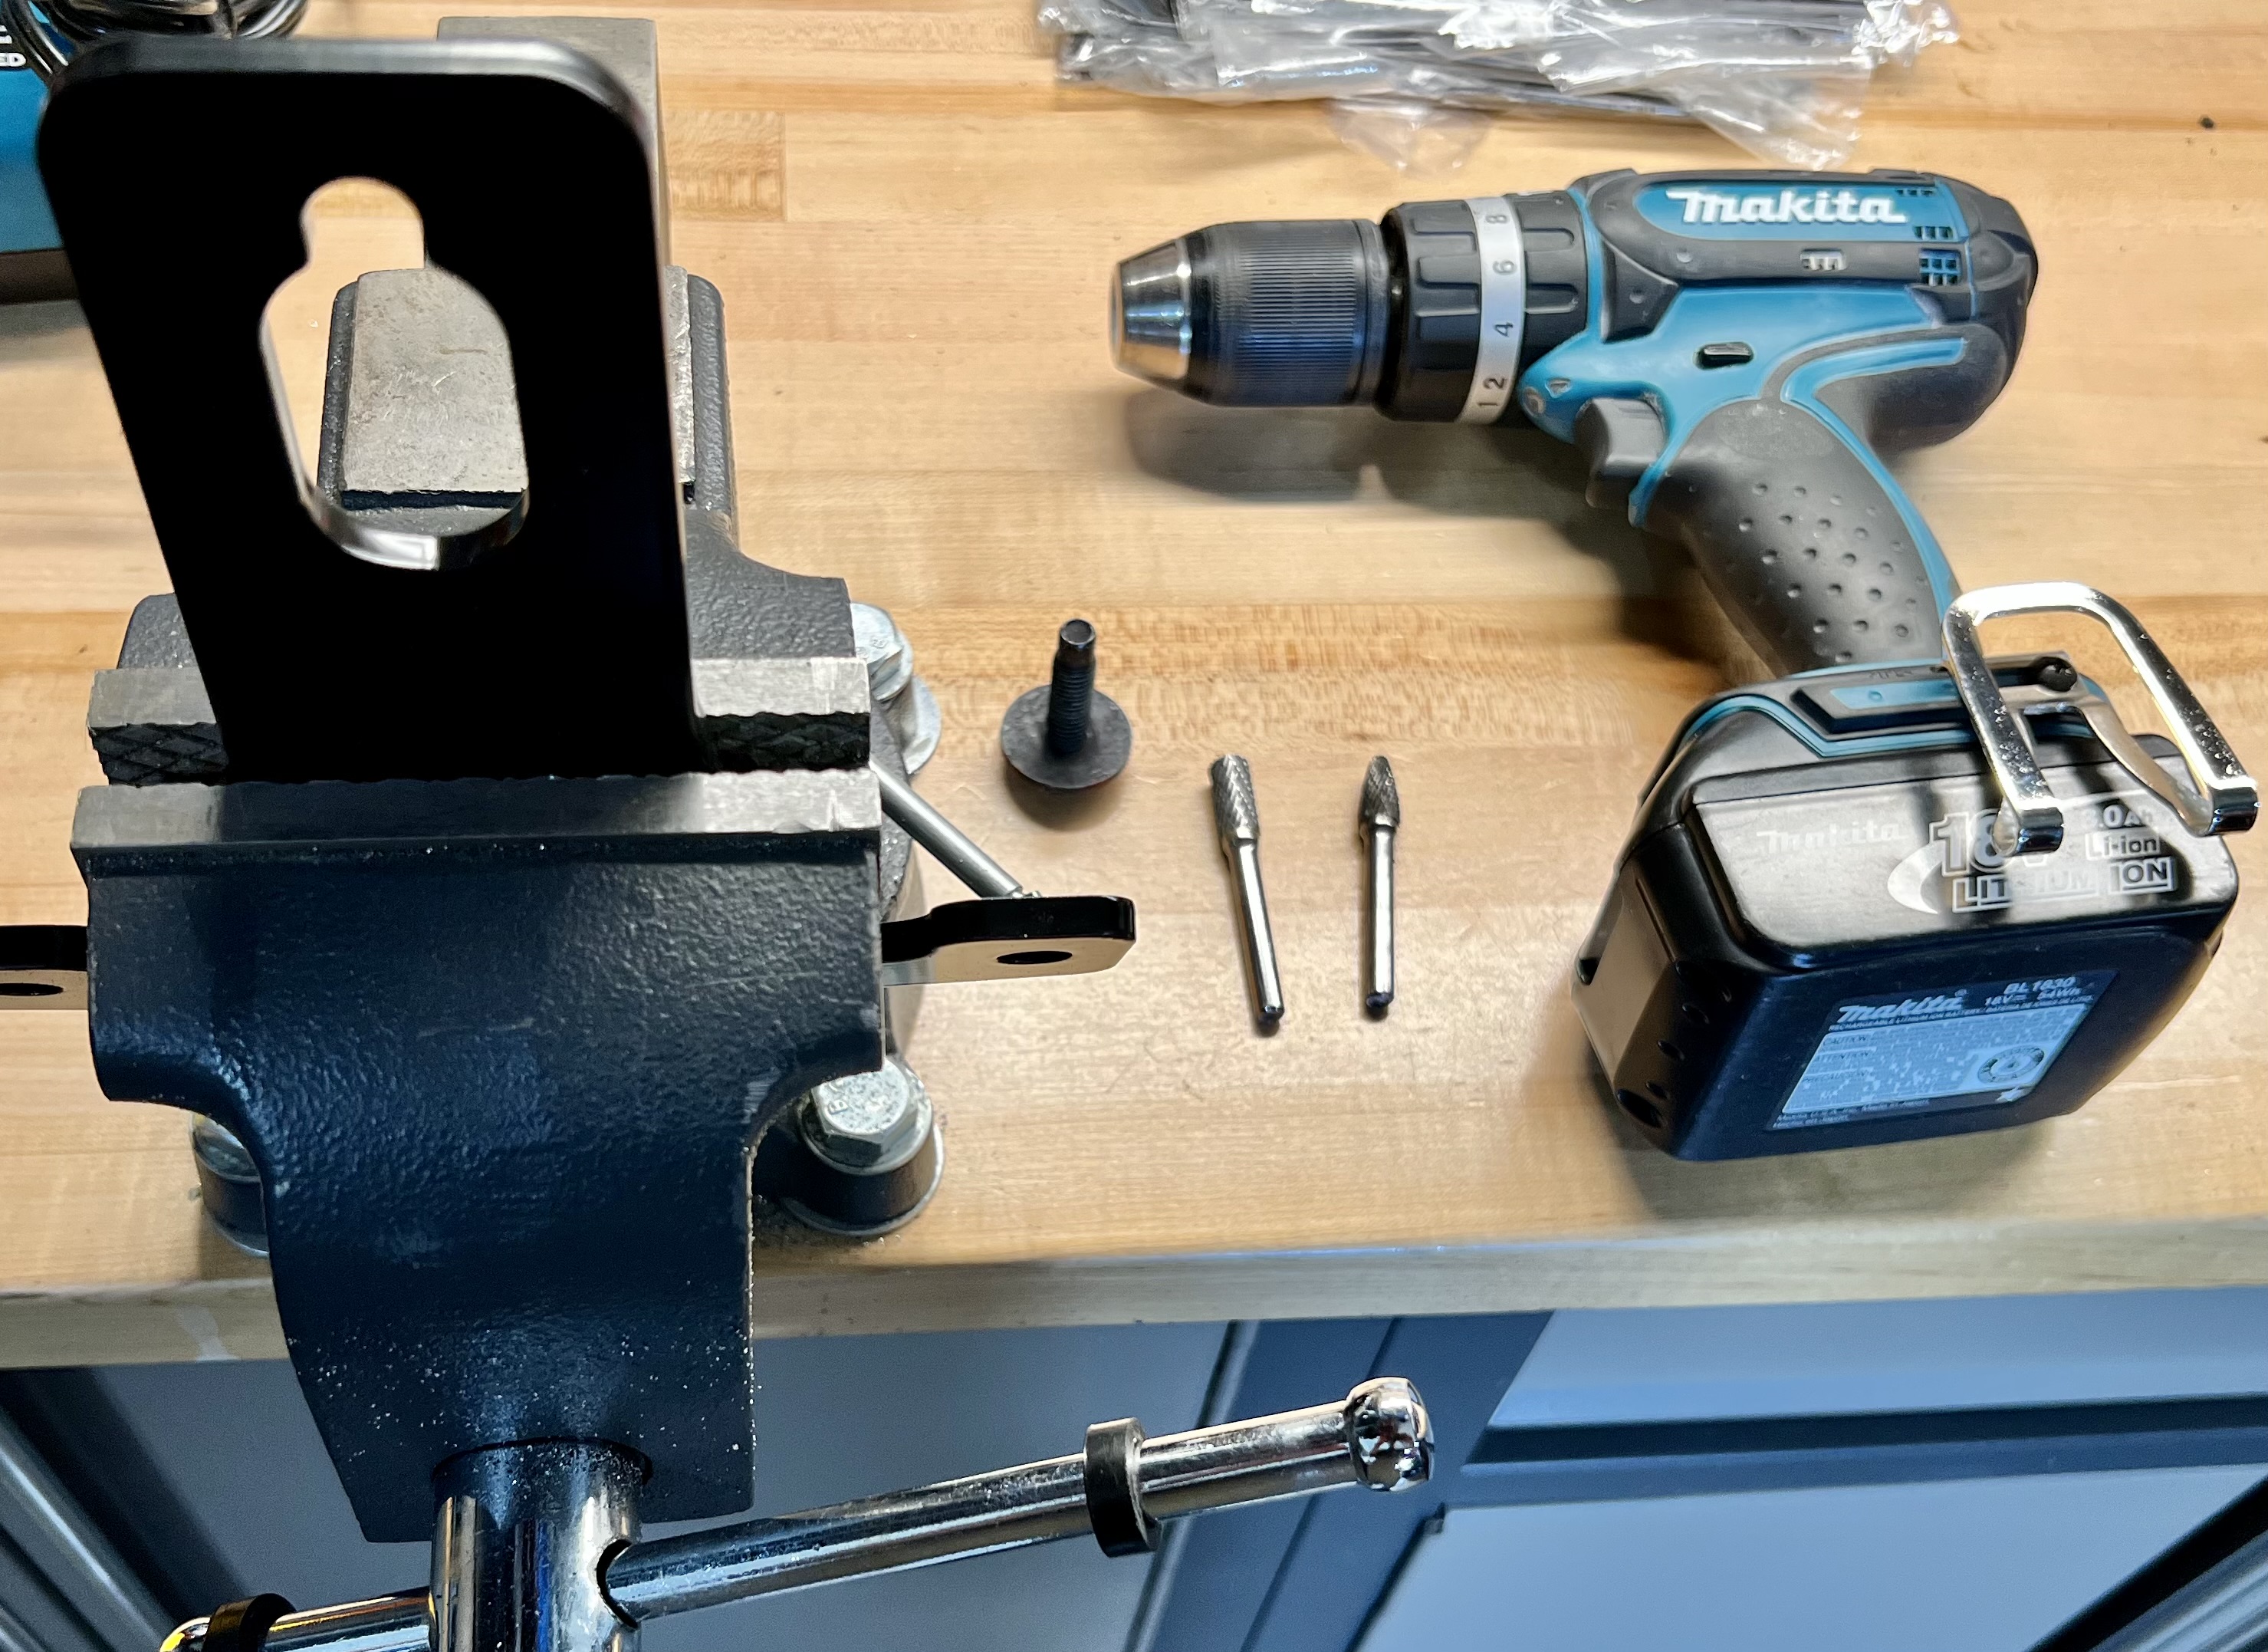
As others have reported, ARB's top chassis mounting bracket's rear bolt washer is larger that its install slot. My solution was to grind out & re-paint the slot.

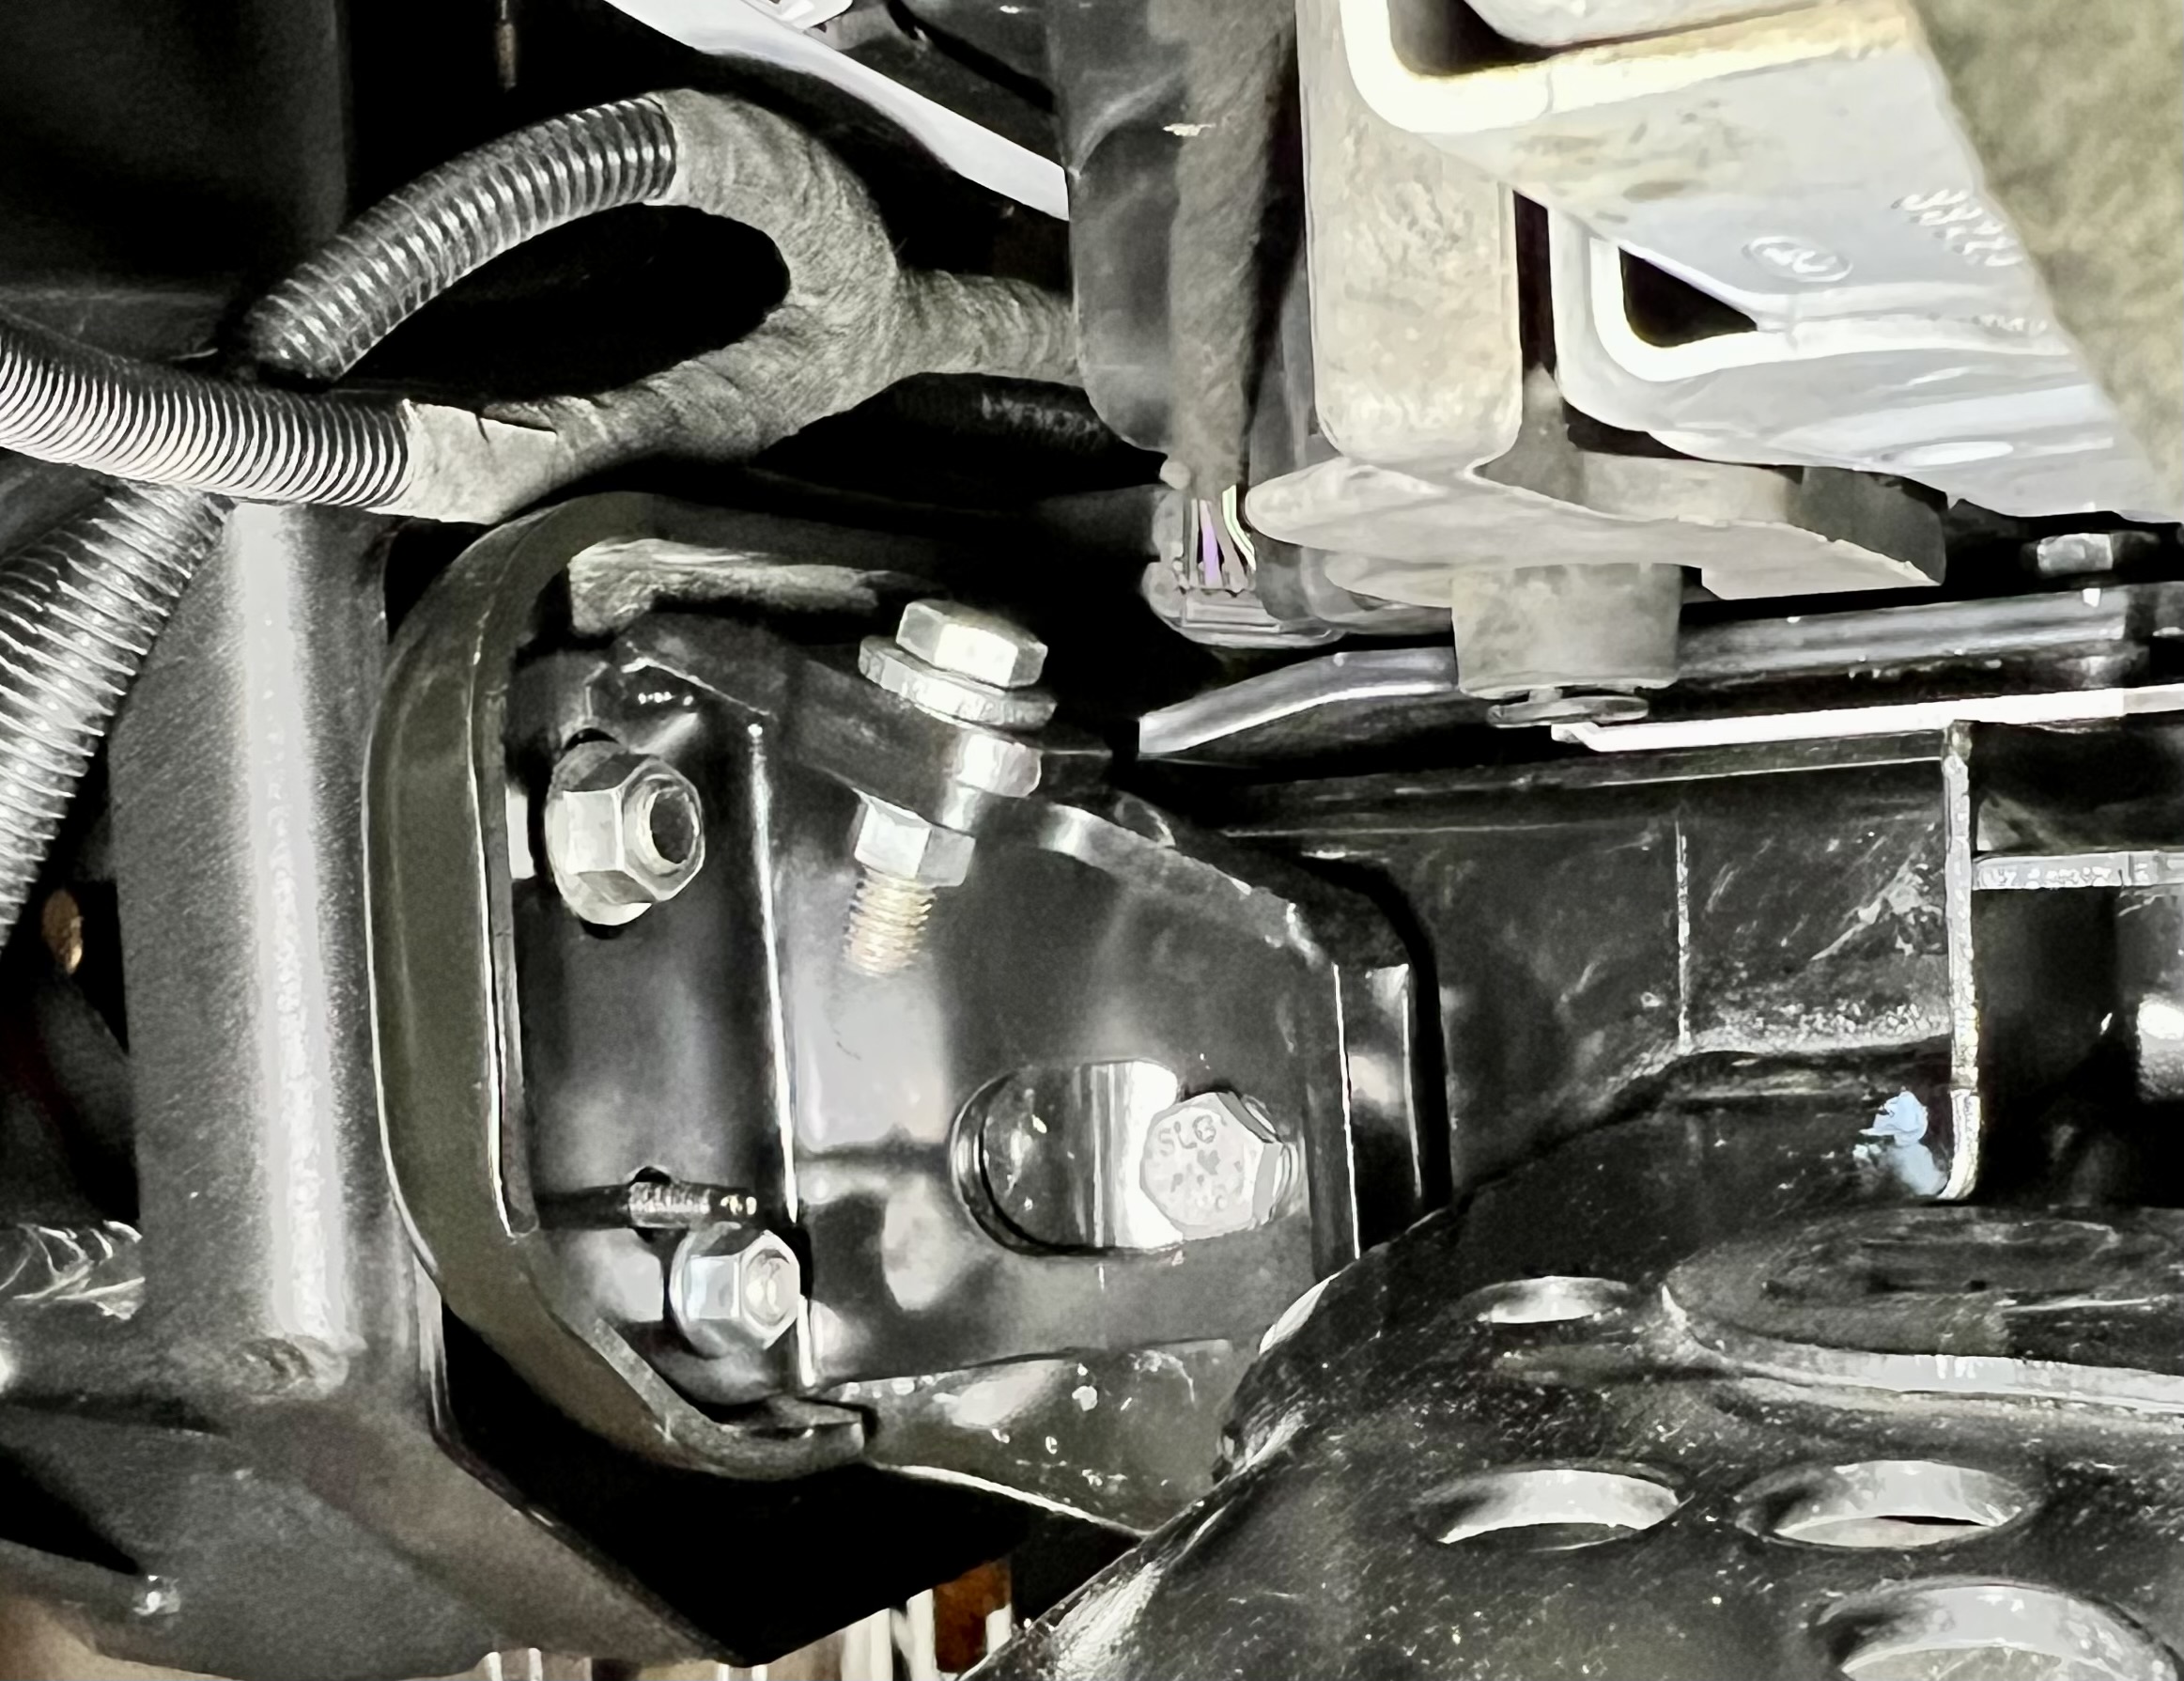
Here's the installed front chassis mounting bracket. In this pic you can see 5 of the 8 bolts connecting each frame horn to ARB's bracket.

If your install includes relocating Bronco's Adaptive Cruise Control/Collision Avoidance radar sensor and installing a winch, add an extension to Bronco's wire harness. I added 30inches.

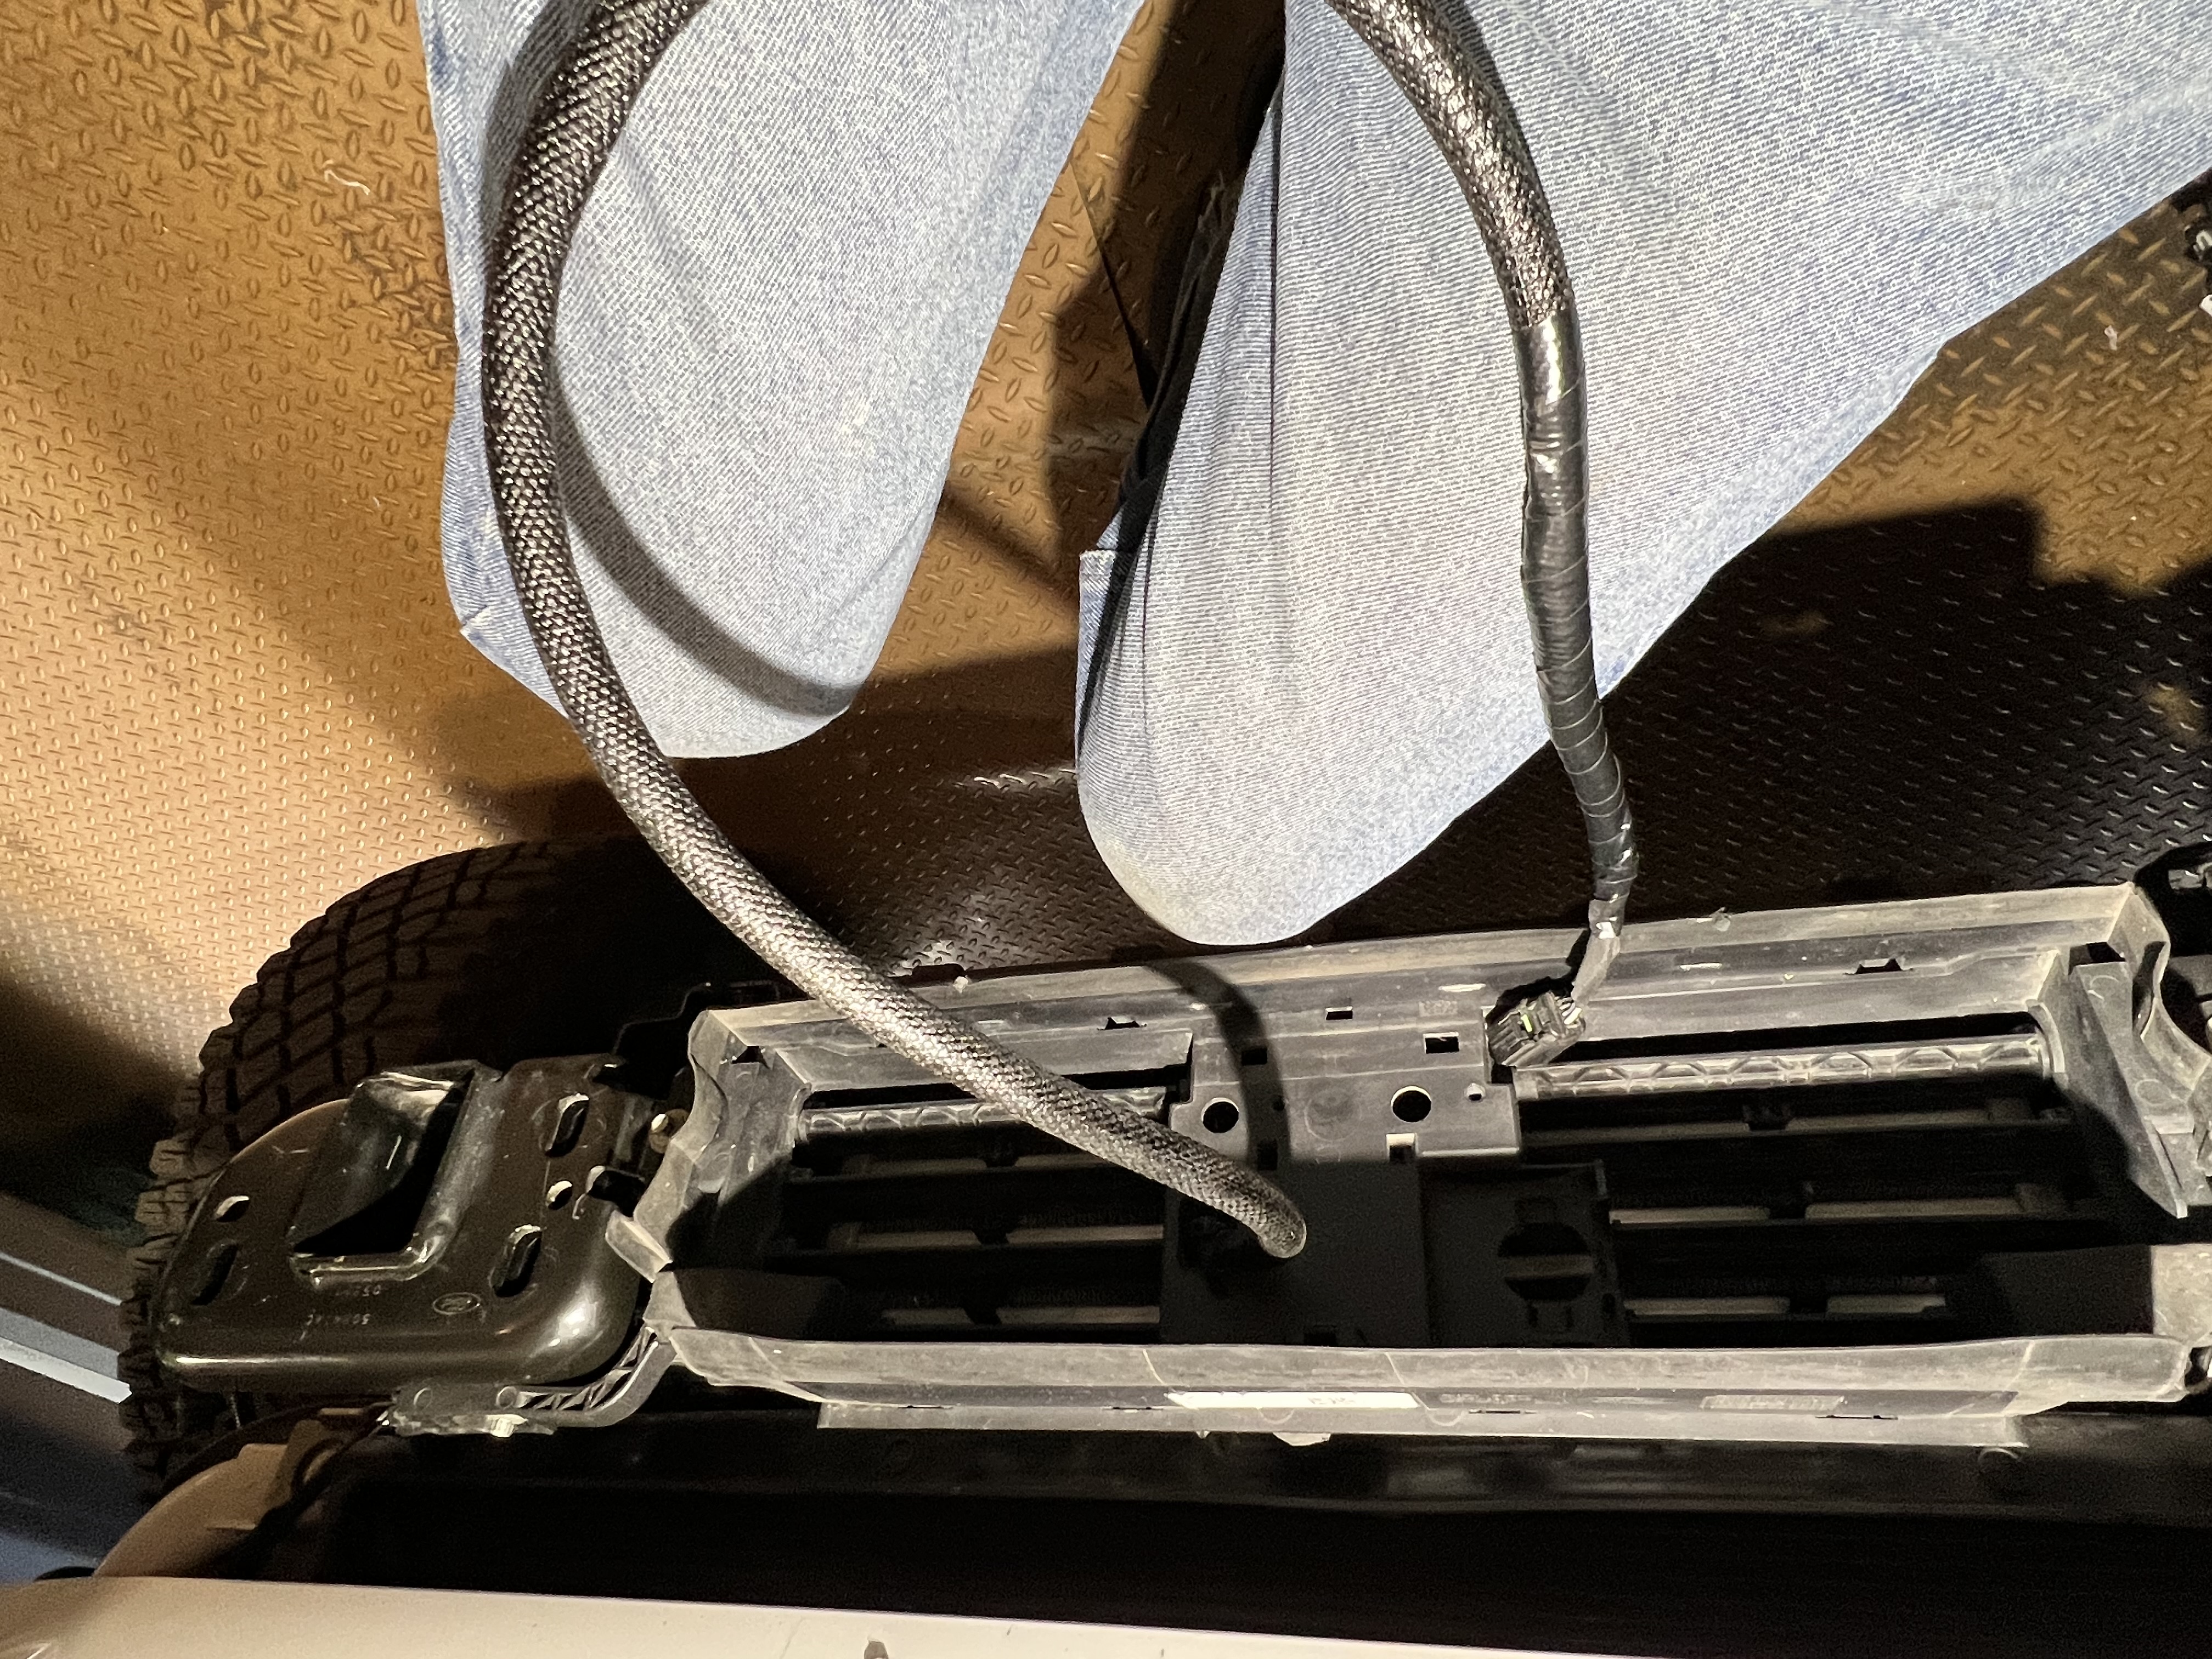
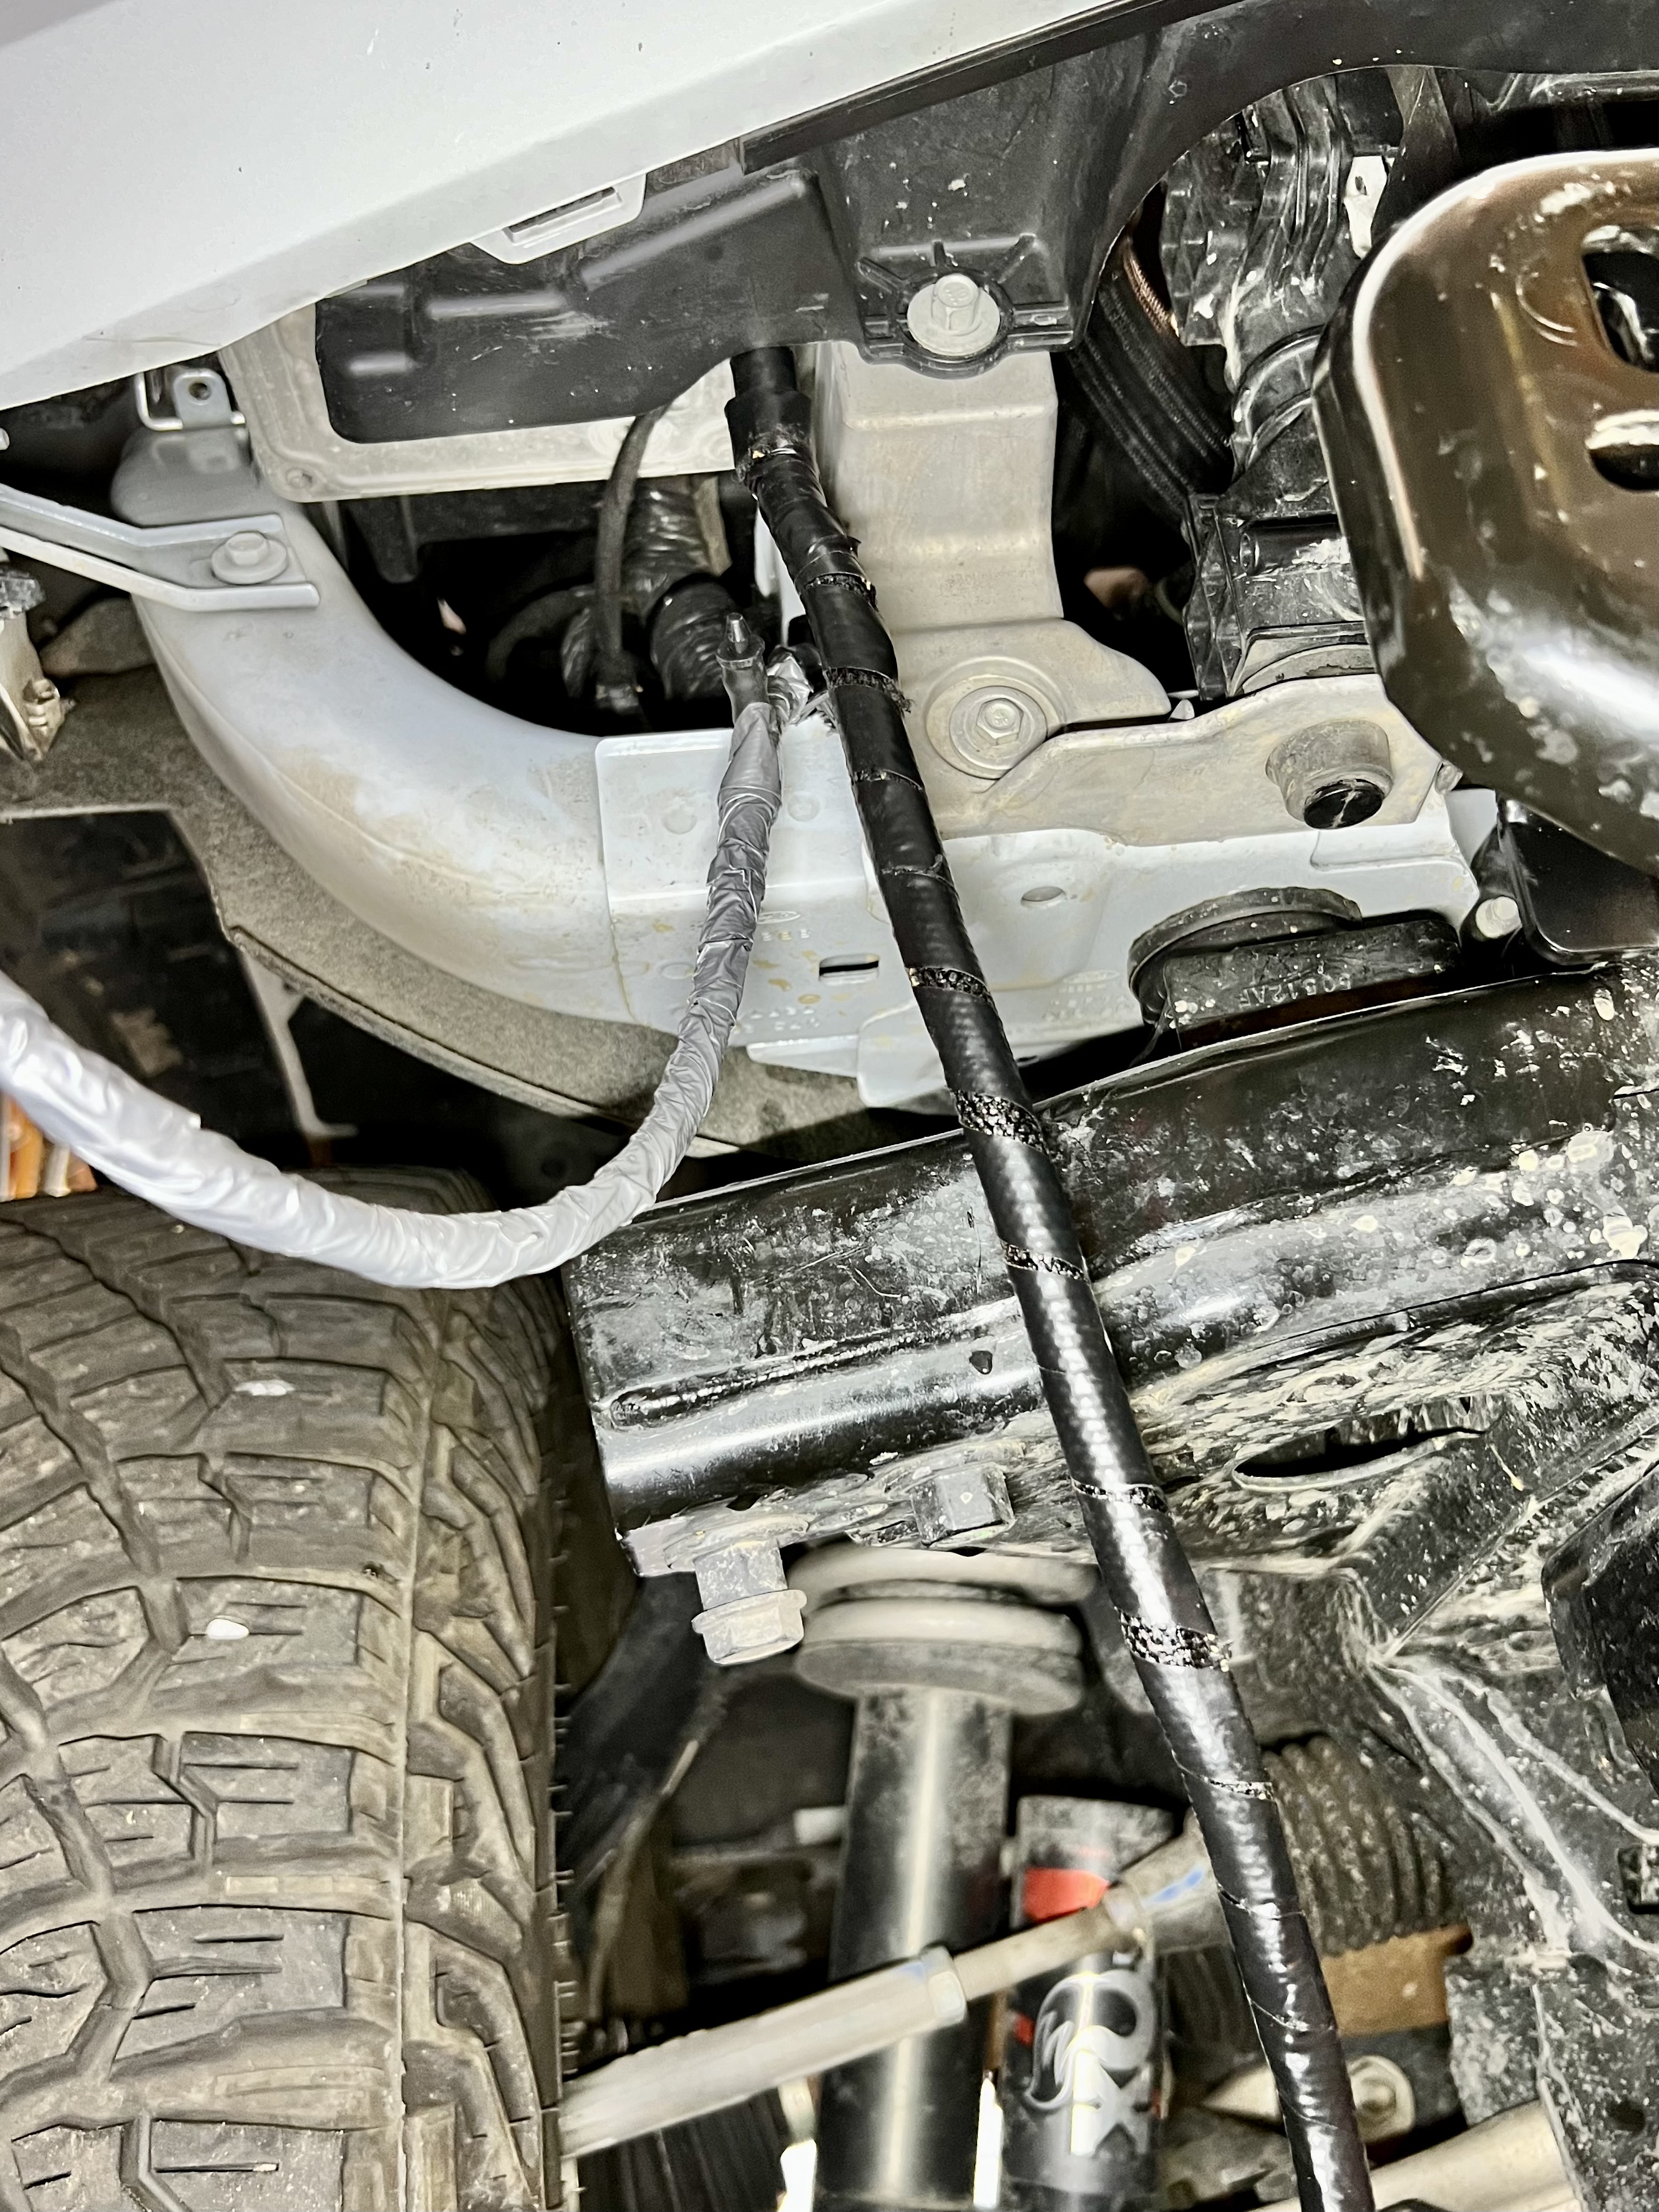
Also, if you're relocating a front camera, you'll need to re-route both camera wire & washer hose. Remove Bronco's air intake box, route wire & hose under airbox and outside/away from the radiator.

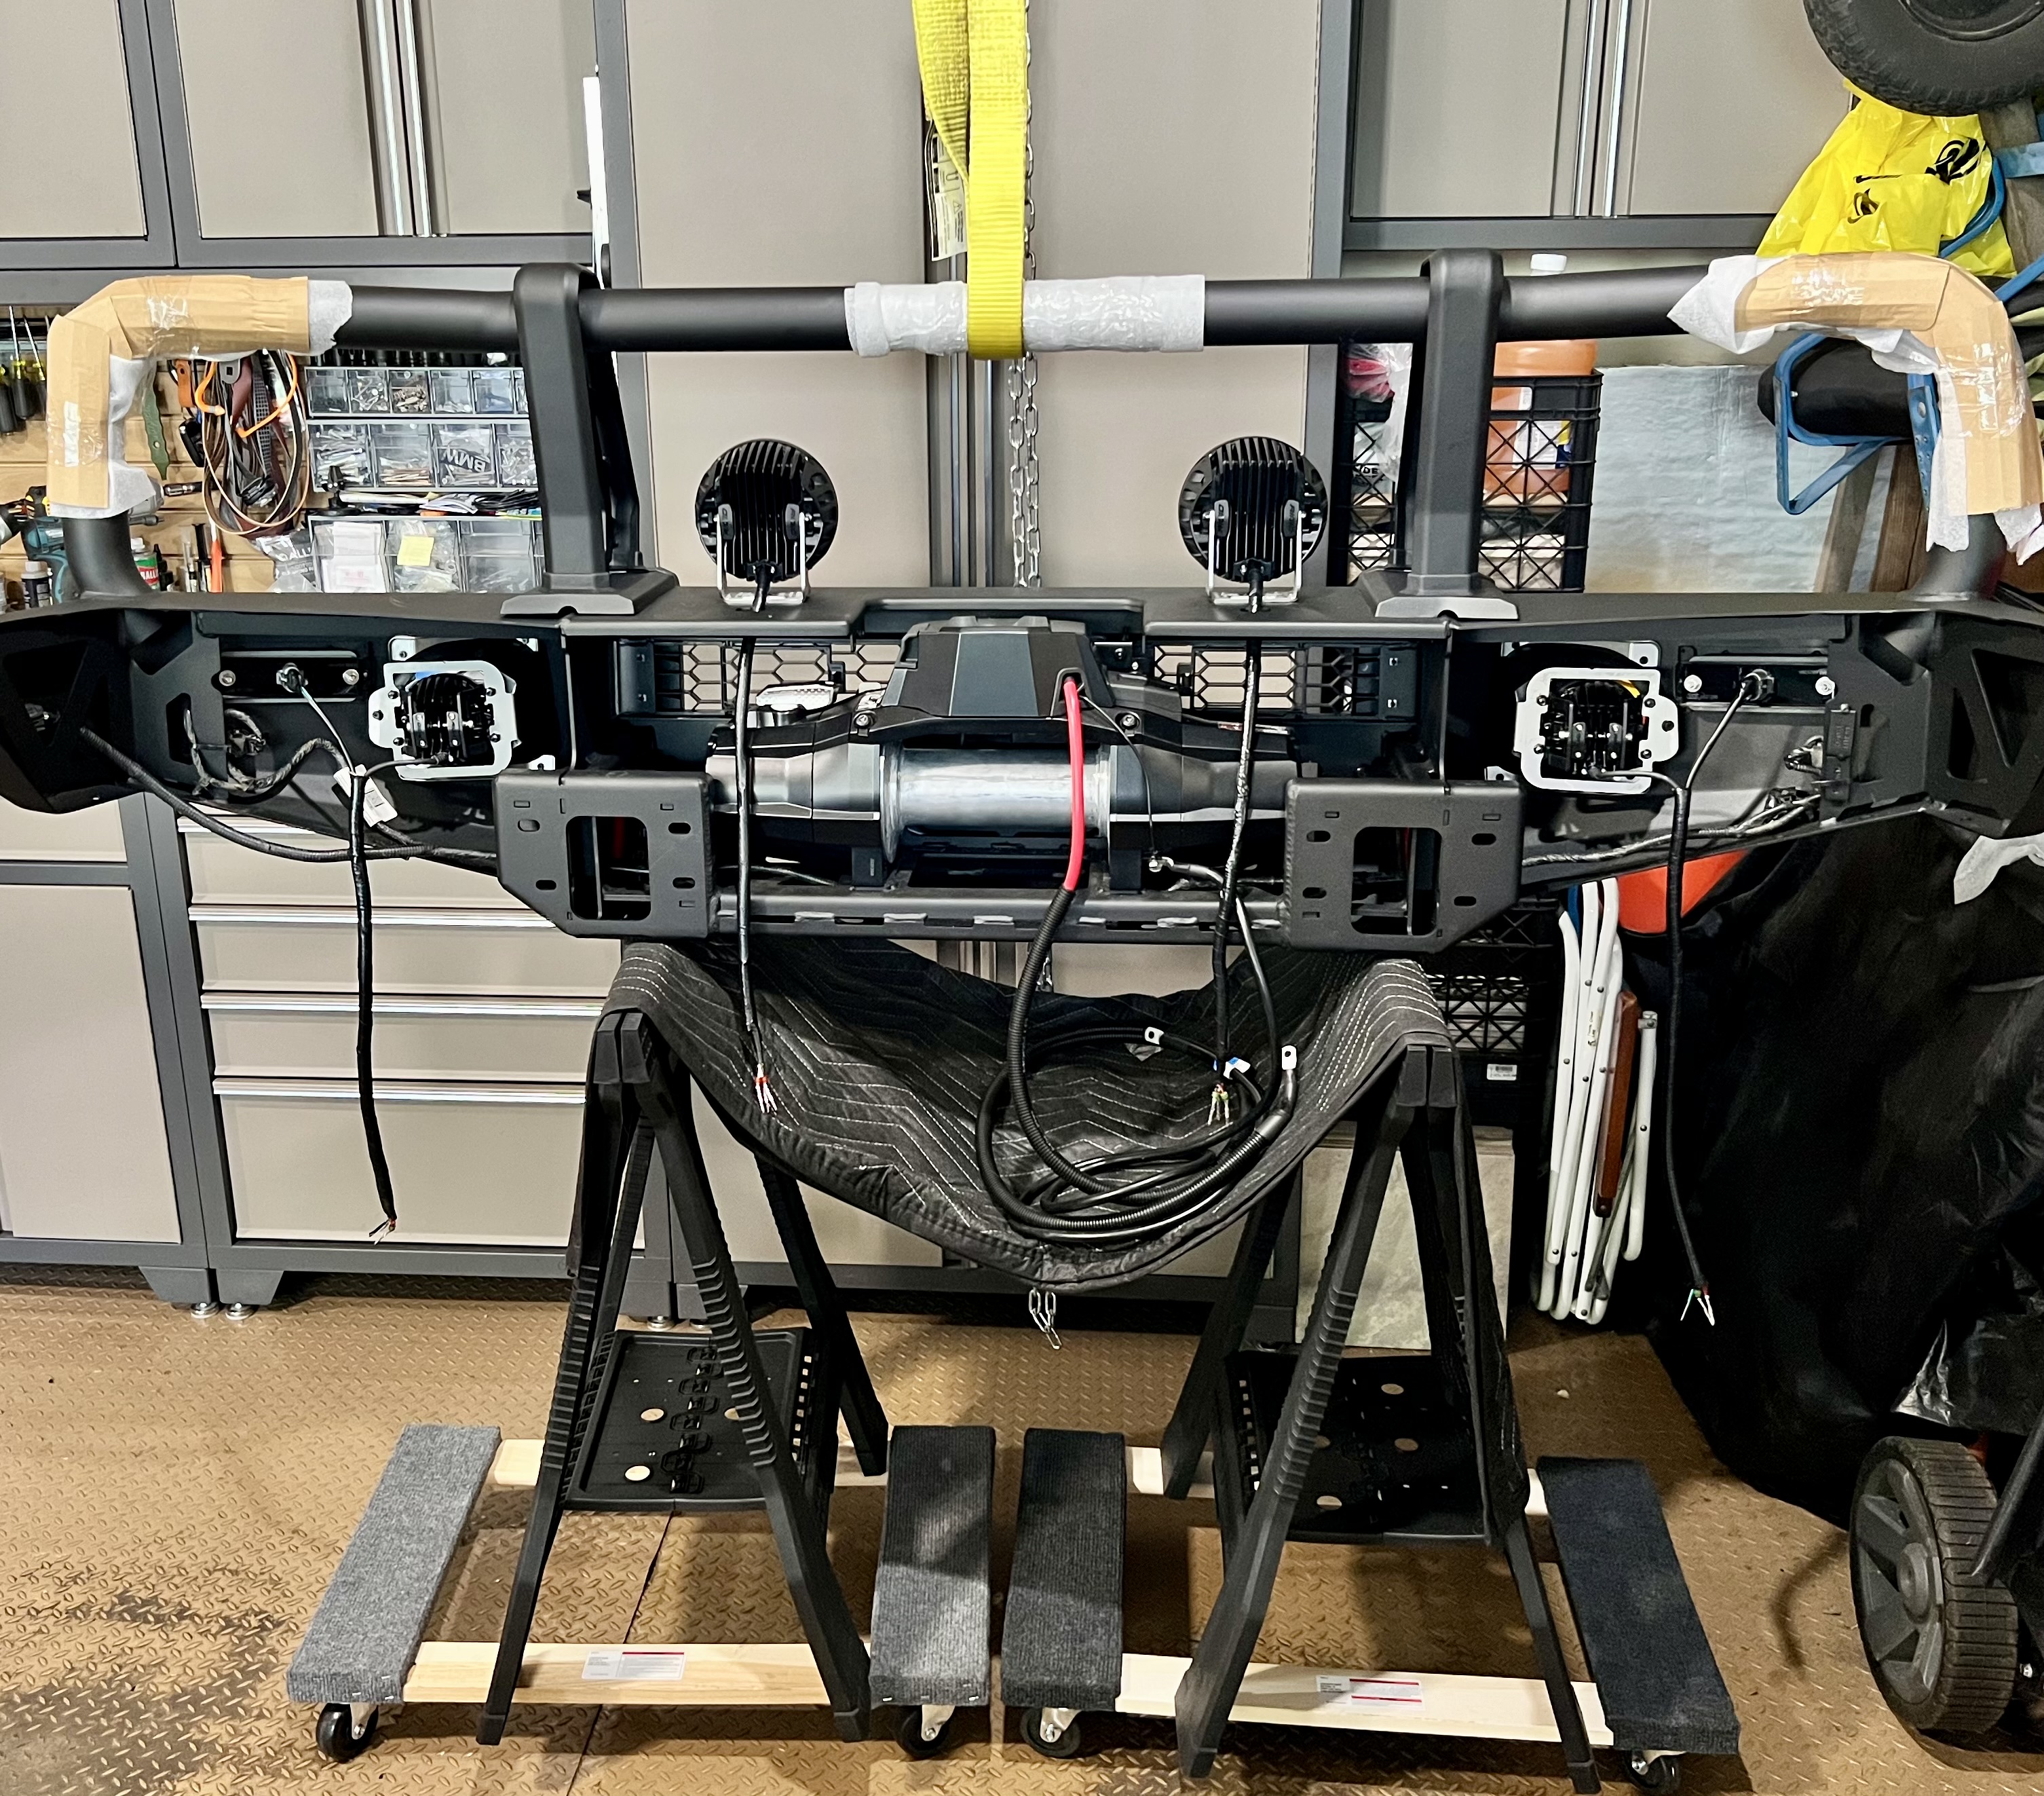
For electricial, I used 1/2" automotive asphalt treated wire loom on most wiring and weather pack connectors, the washer hose got a duck tape wrap. Here's front camera wiring and hose re-routed with plenty of length.

Another tip suggestion is to install camera & radar sensor before the winch. ARB's task sequence mounts the winch early in their bumper assembly, which GREATLY increases difficulty accessing these components' location.


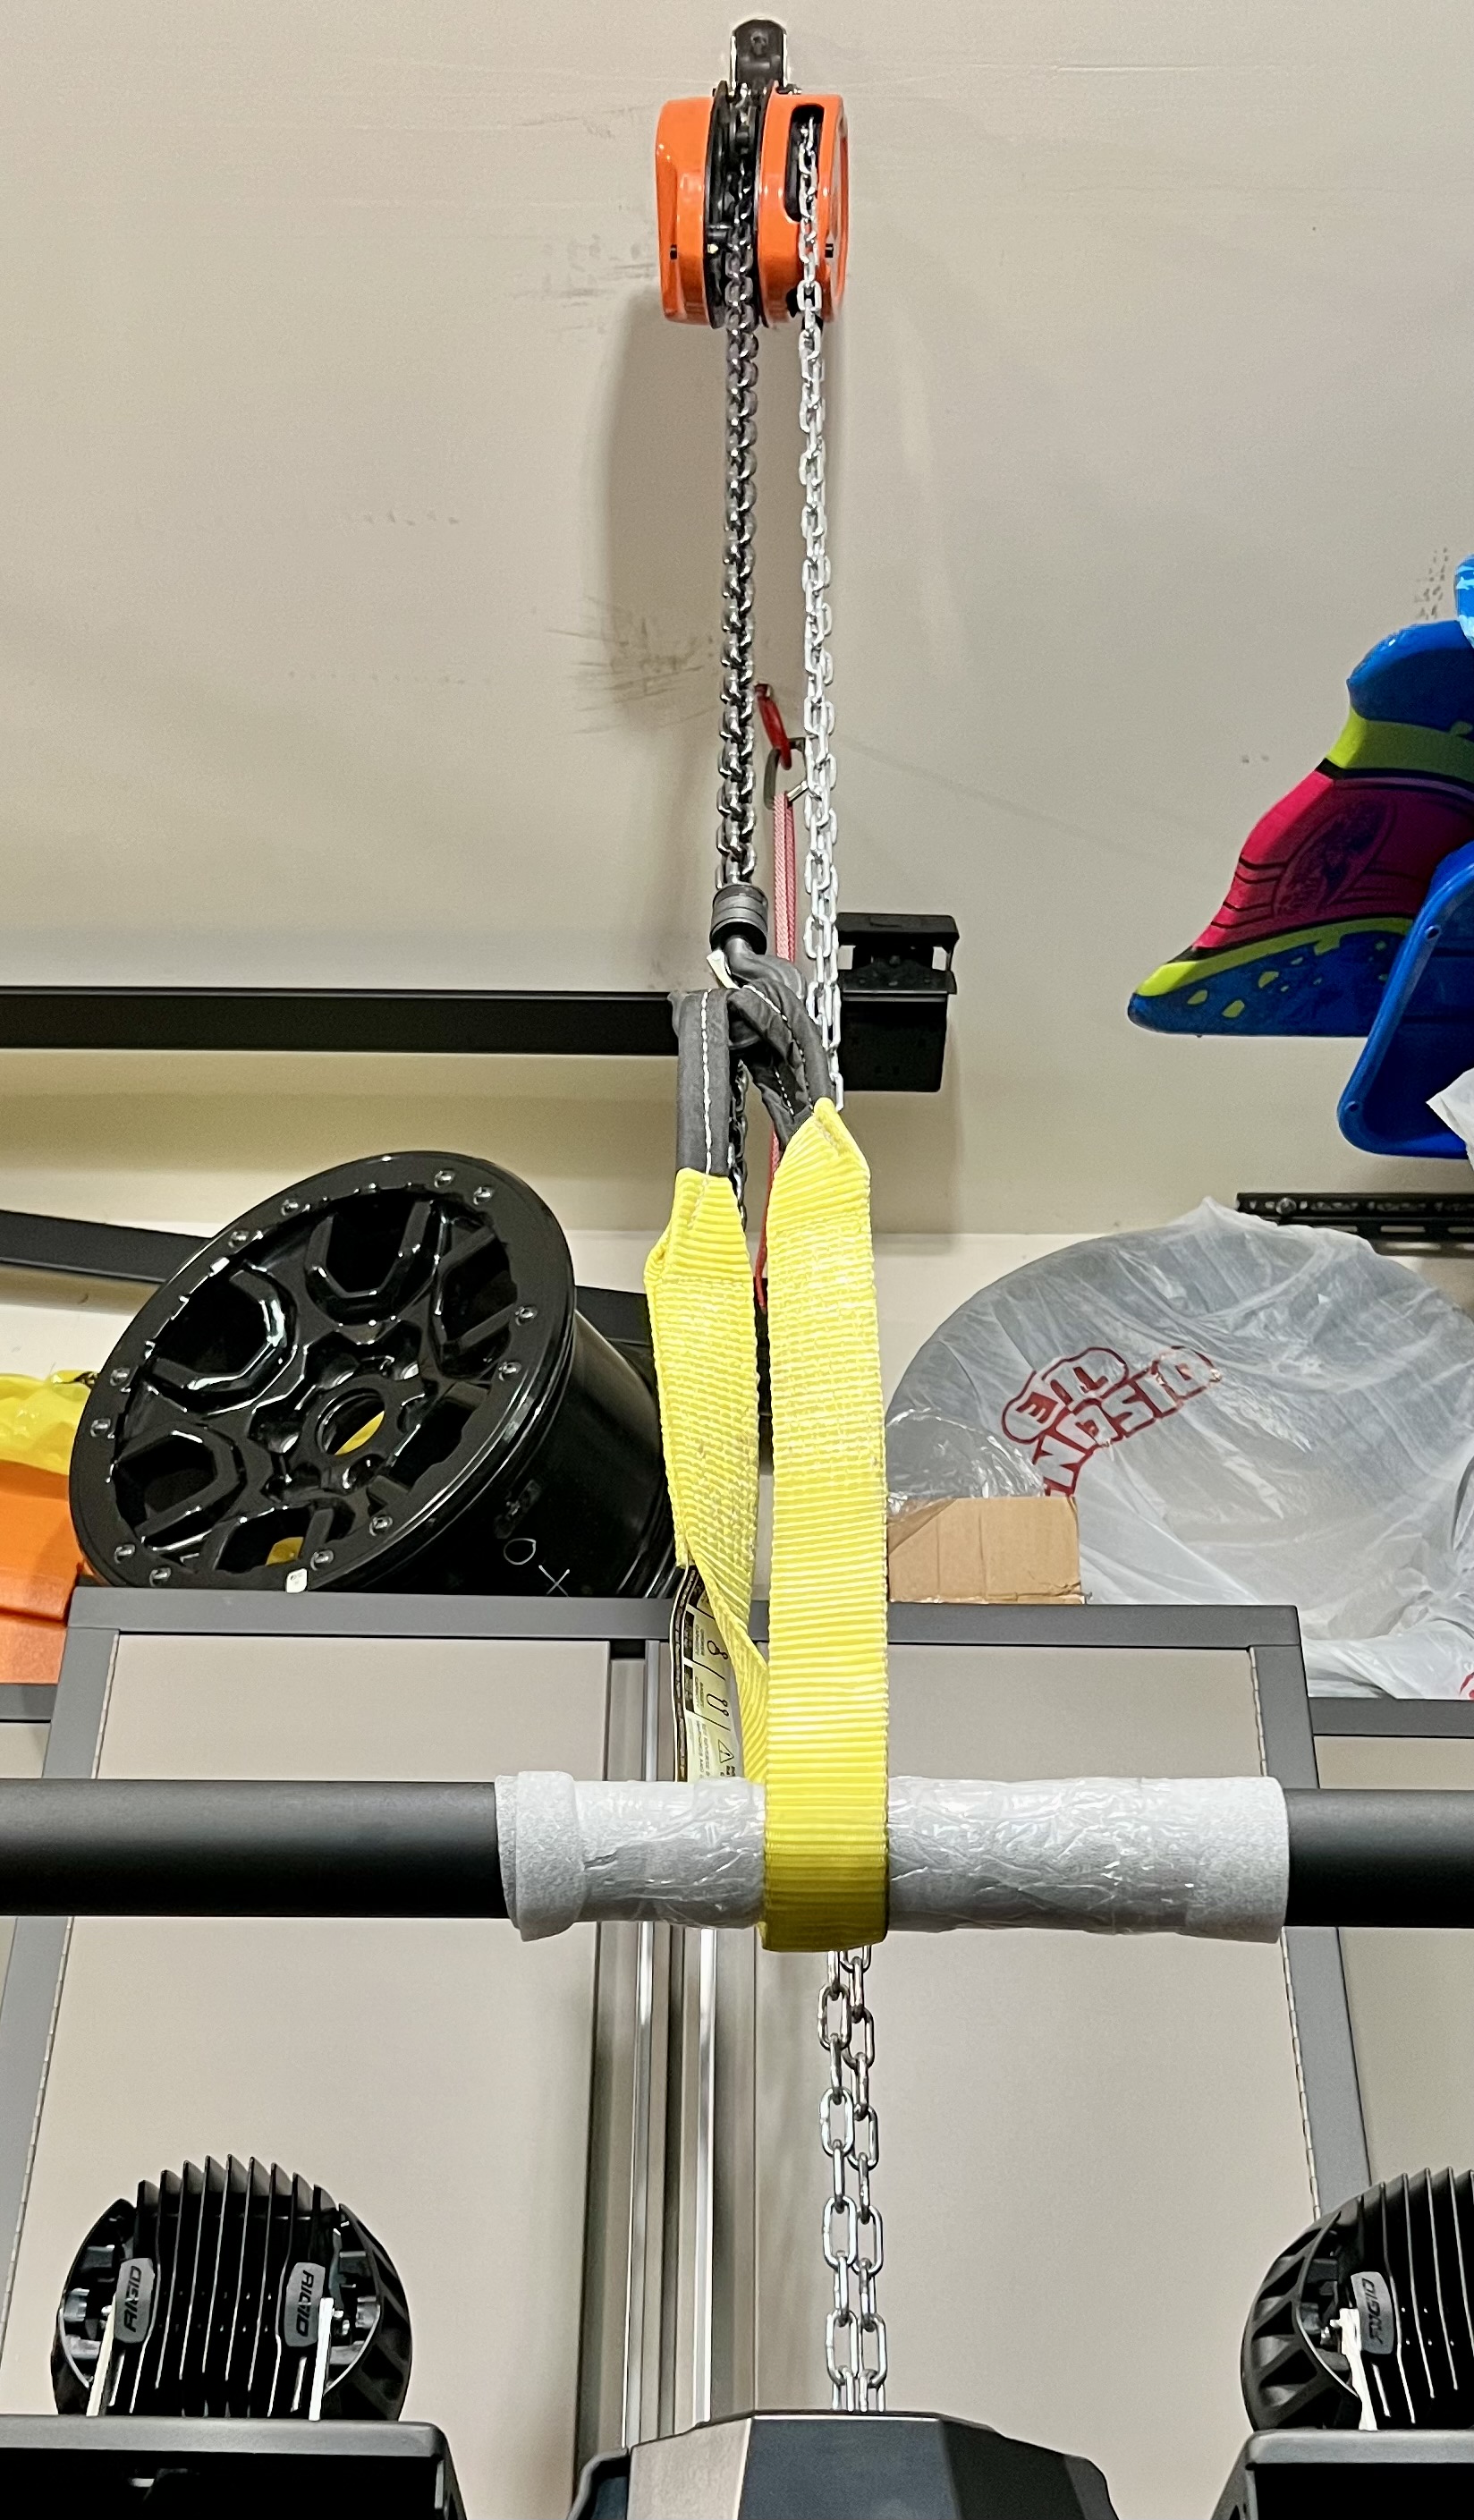
Speaking of bumper assembly, you'll need a sturdy surface for ARB bumpers, and for the front, a hefty lift to handle this ~170lb bumper and 70lb winch. Mine was a solo project and needed to be mobile. It's ugly - but worked!

Used the ceiling hoist I use to place seasonal tire/wheels in overhead rack storage to lift this beast to a measured height, then drove Bronco into the bumper.


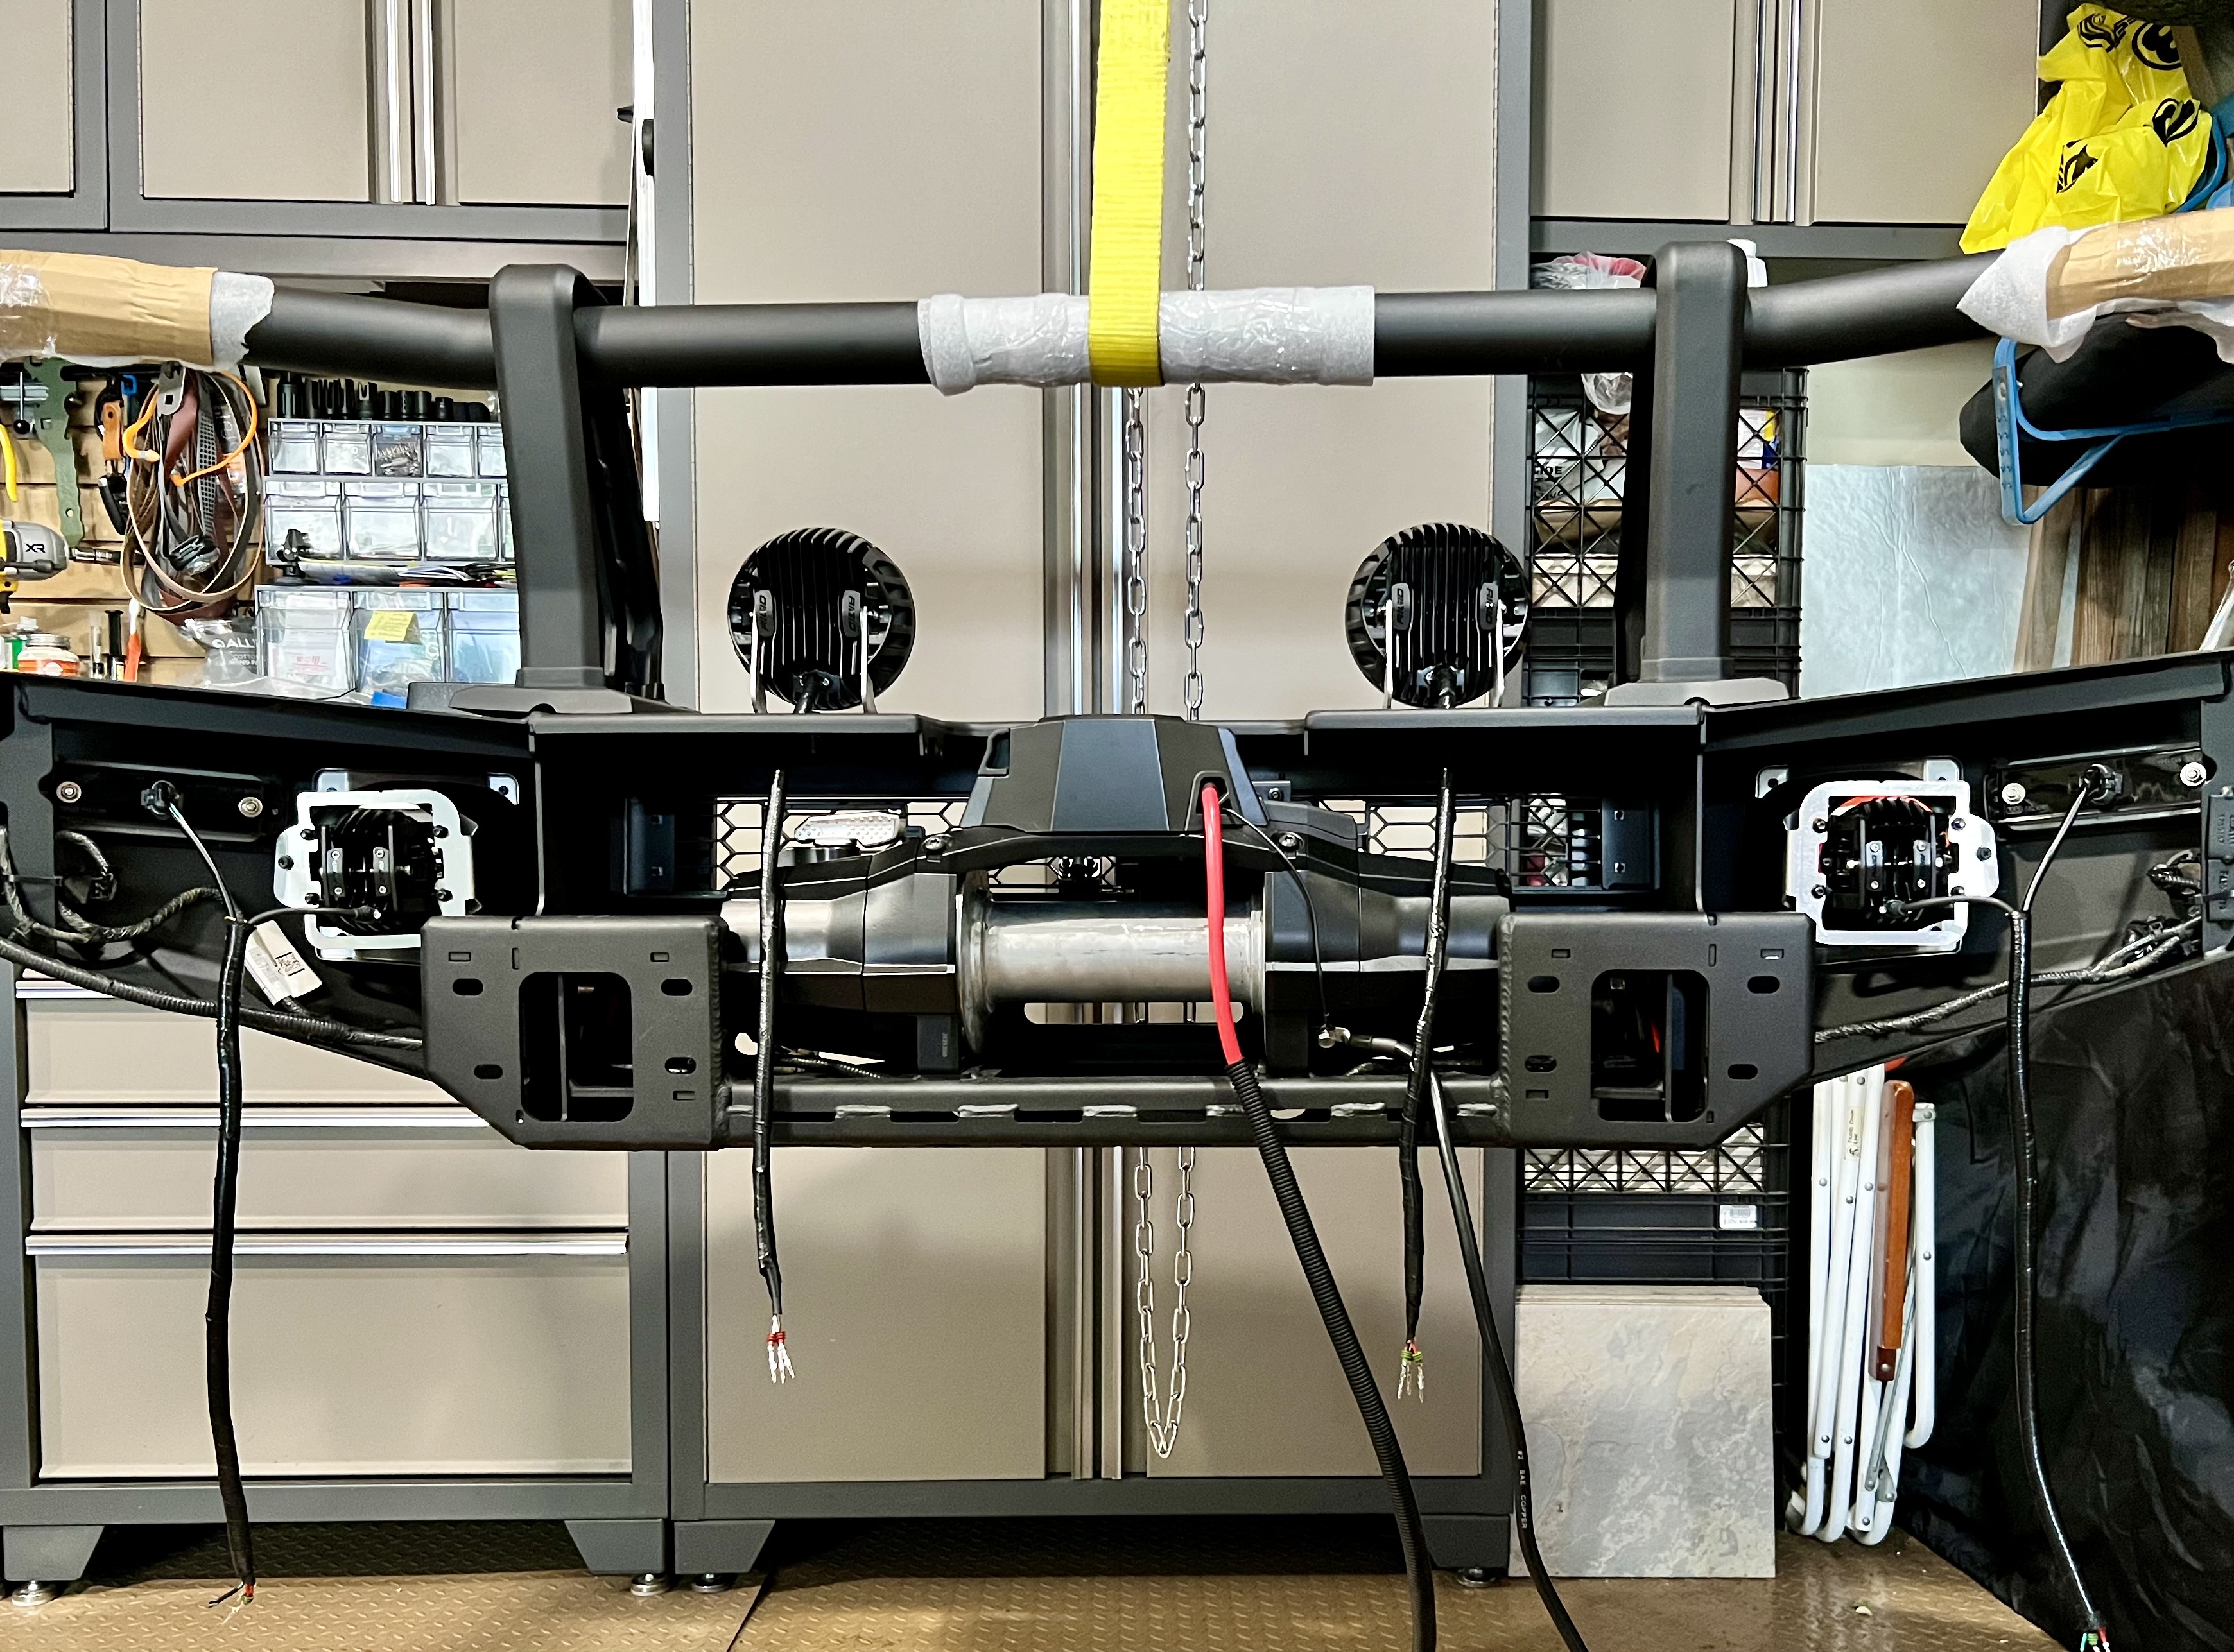
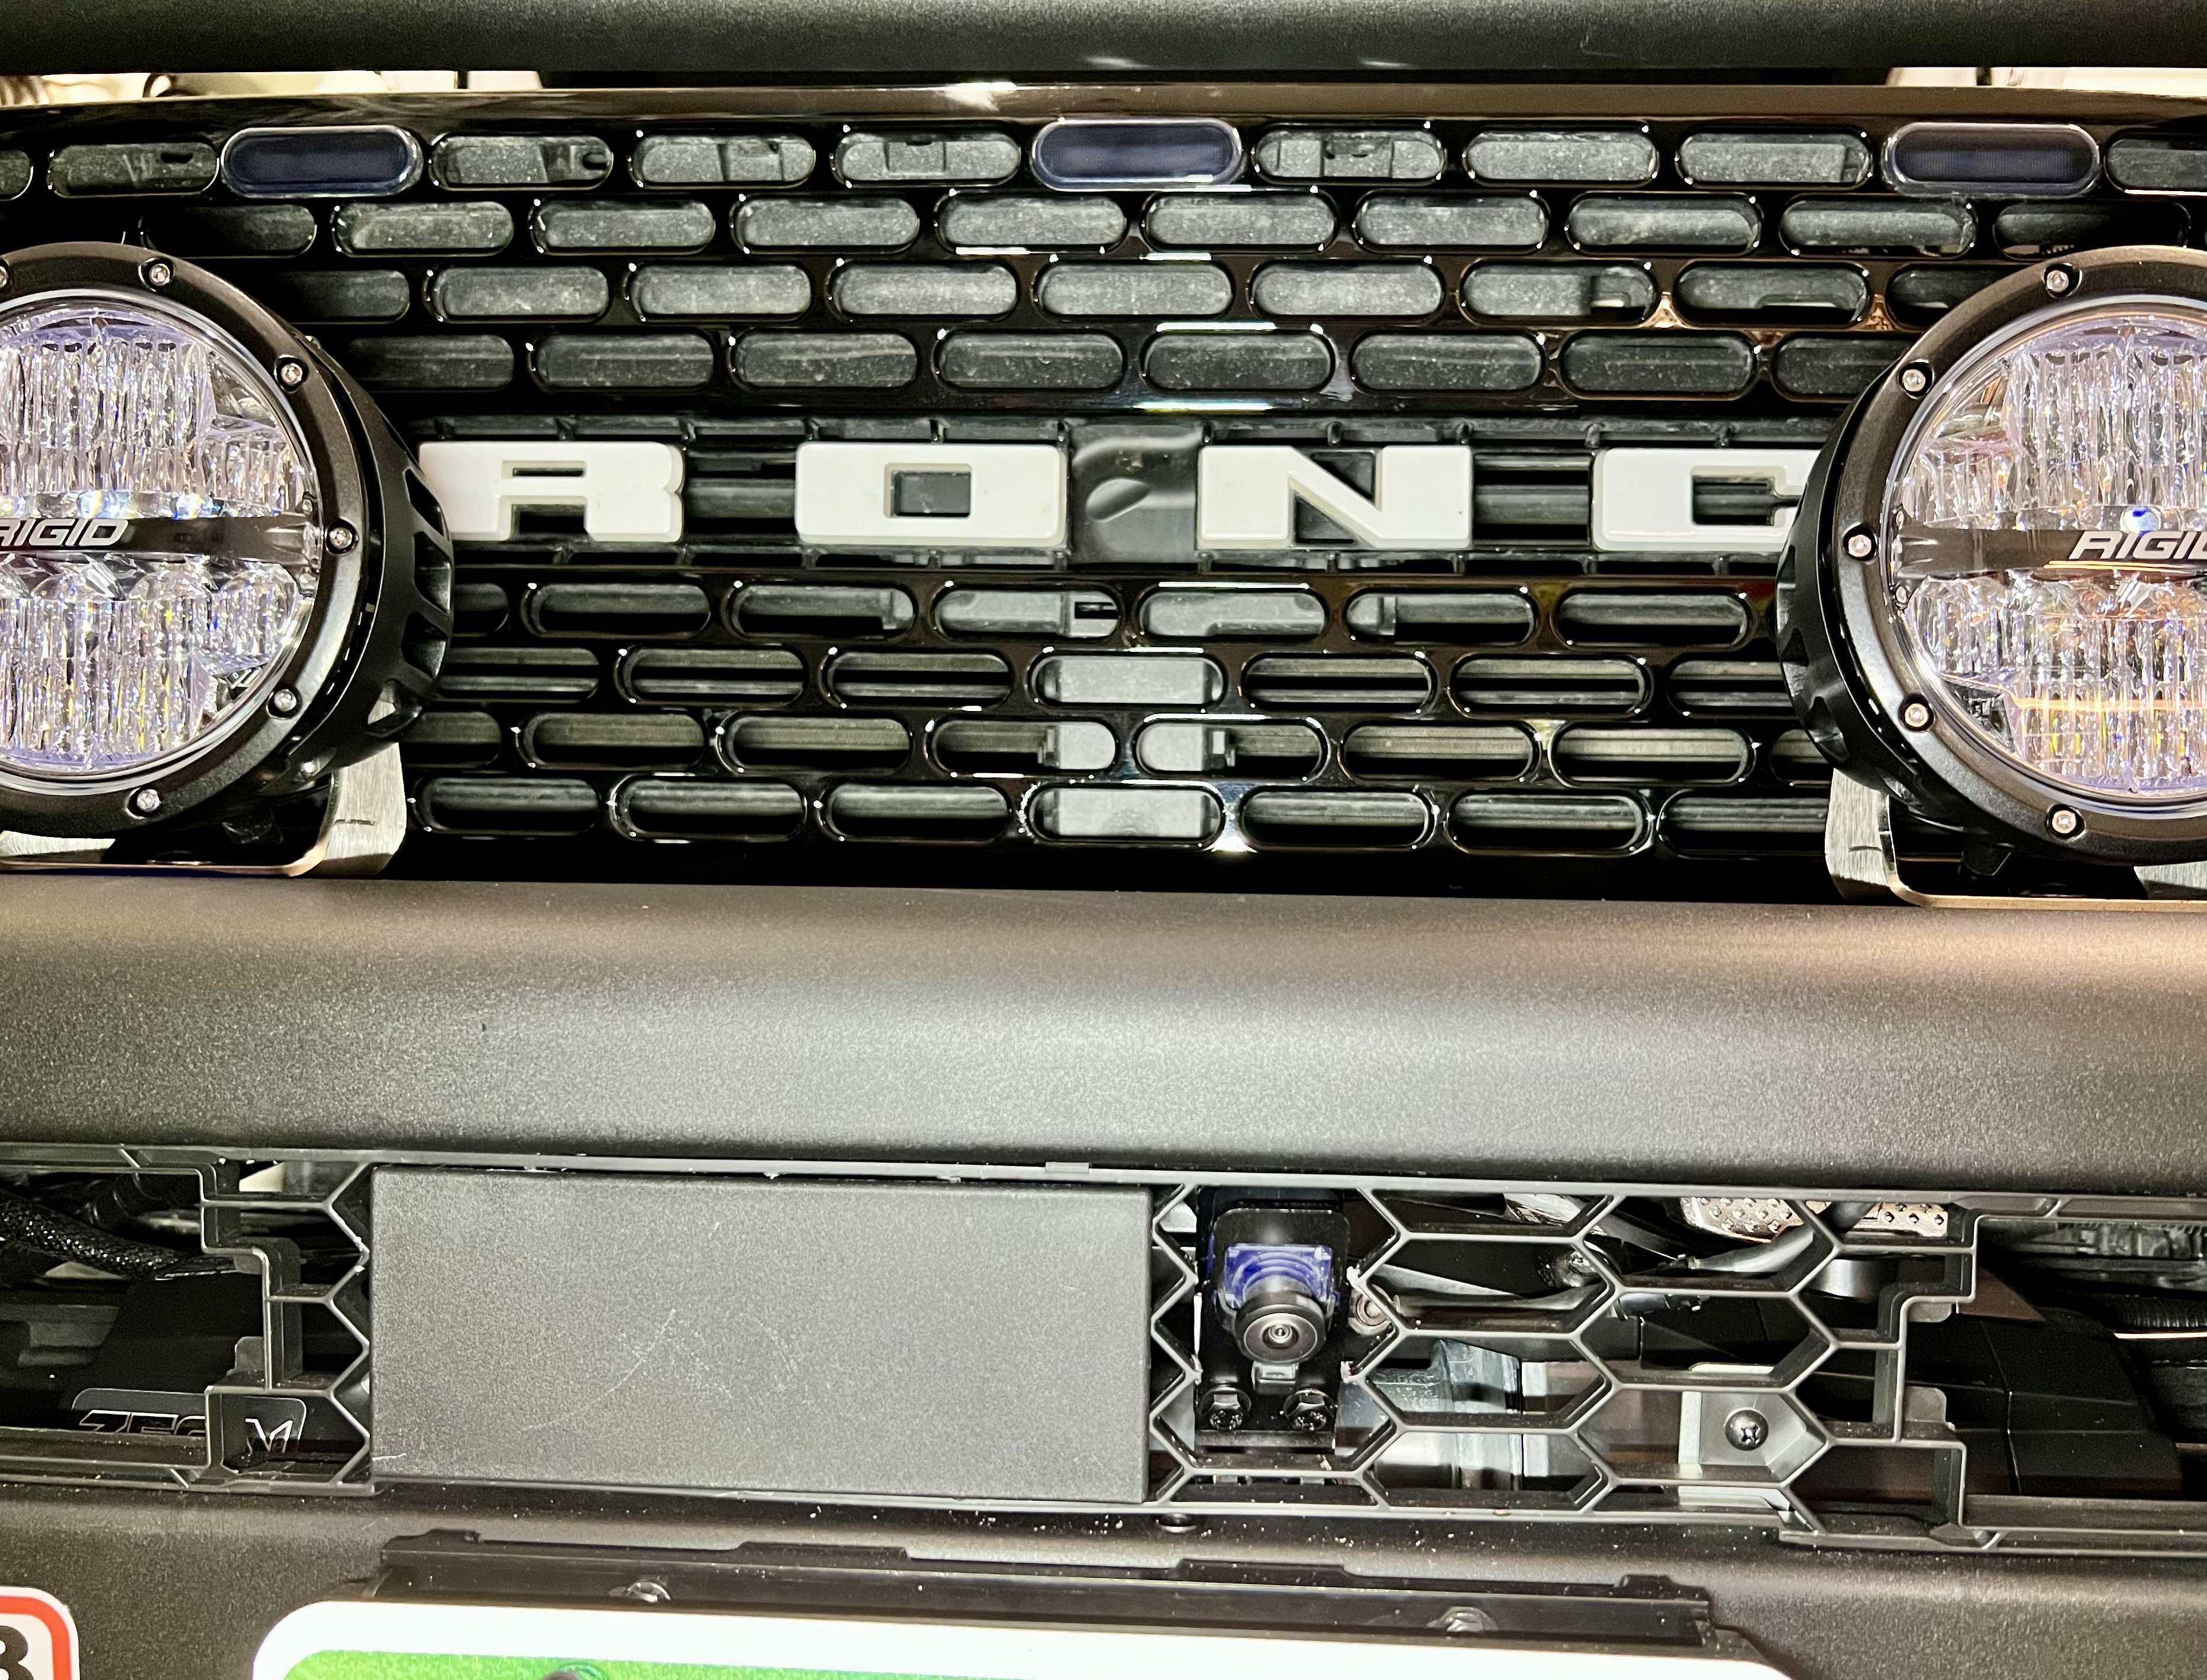
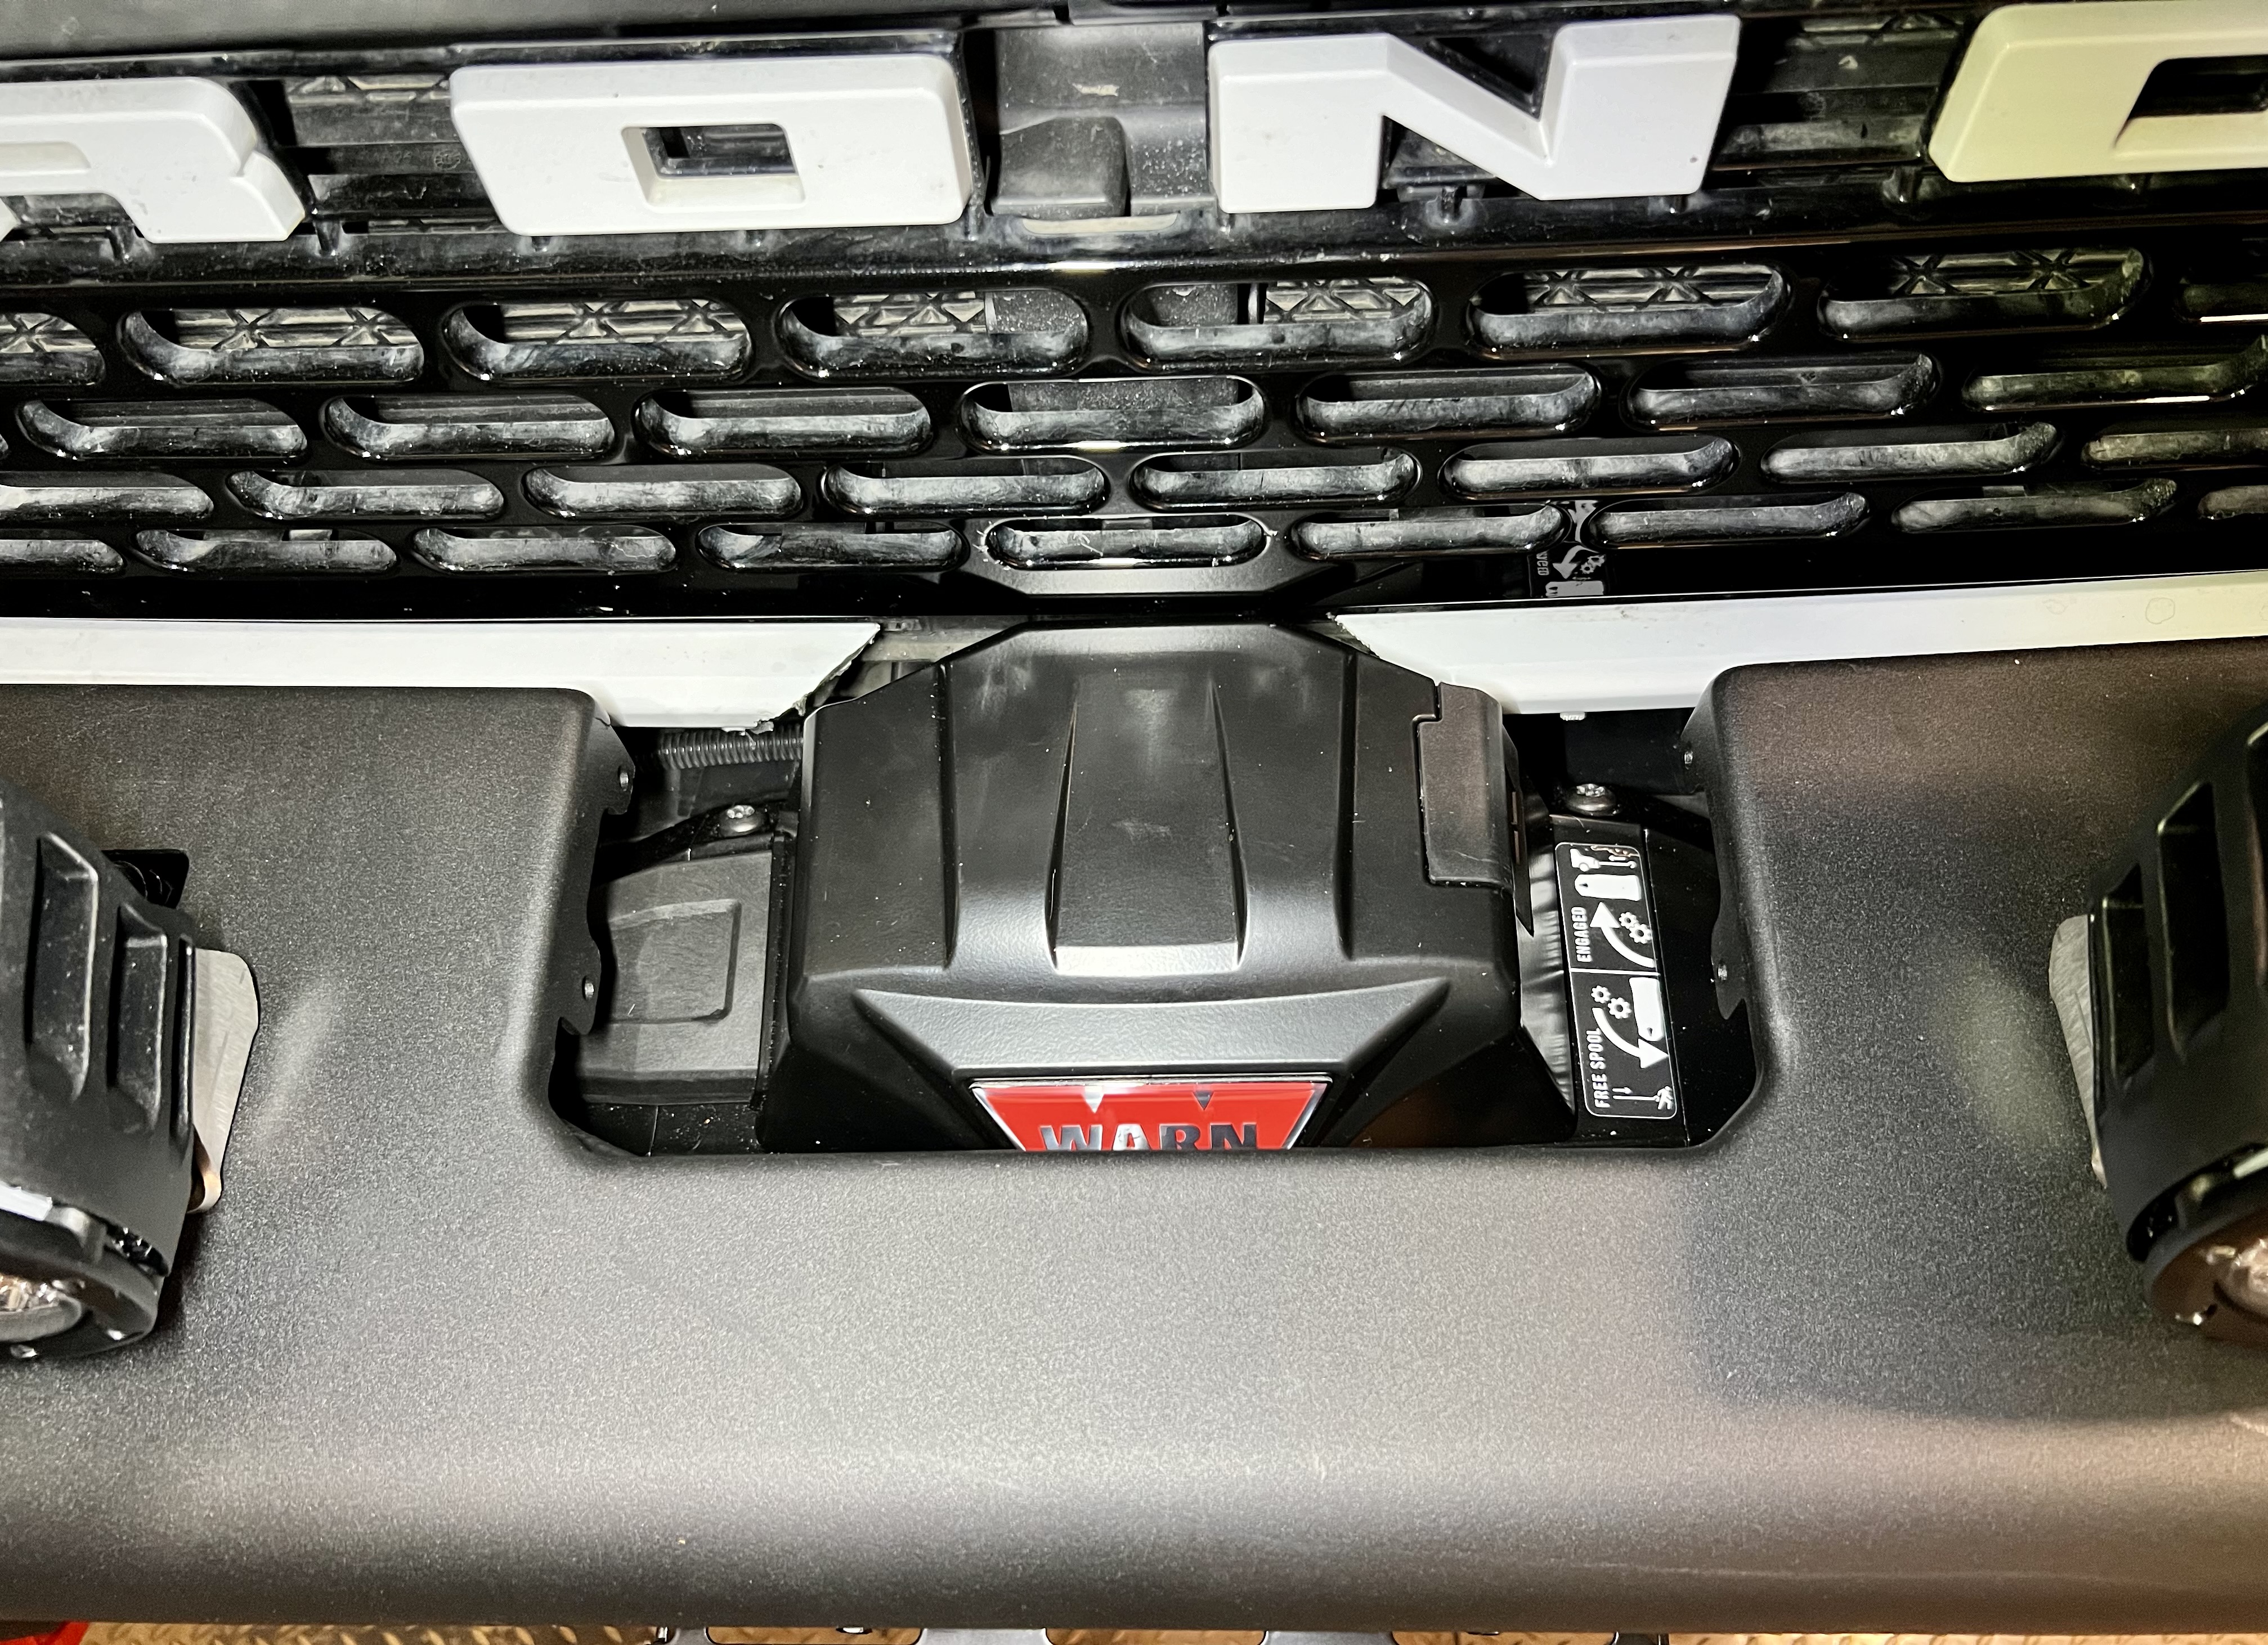
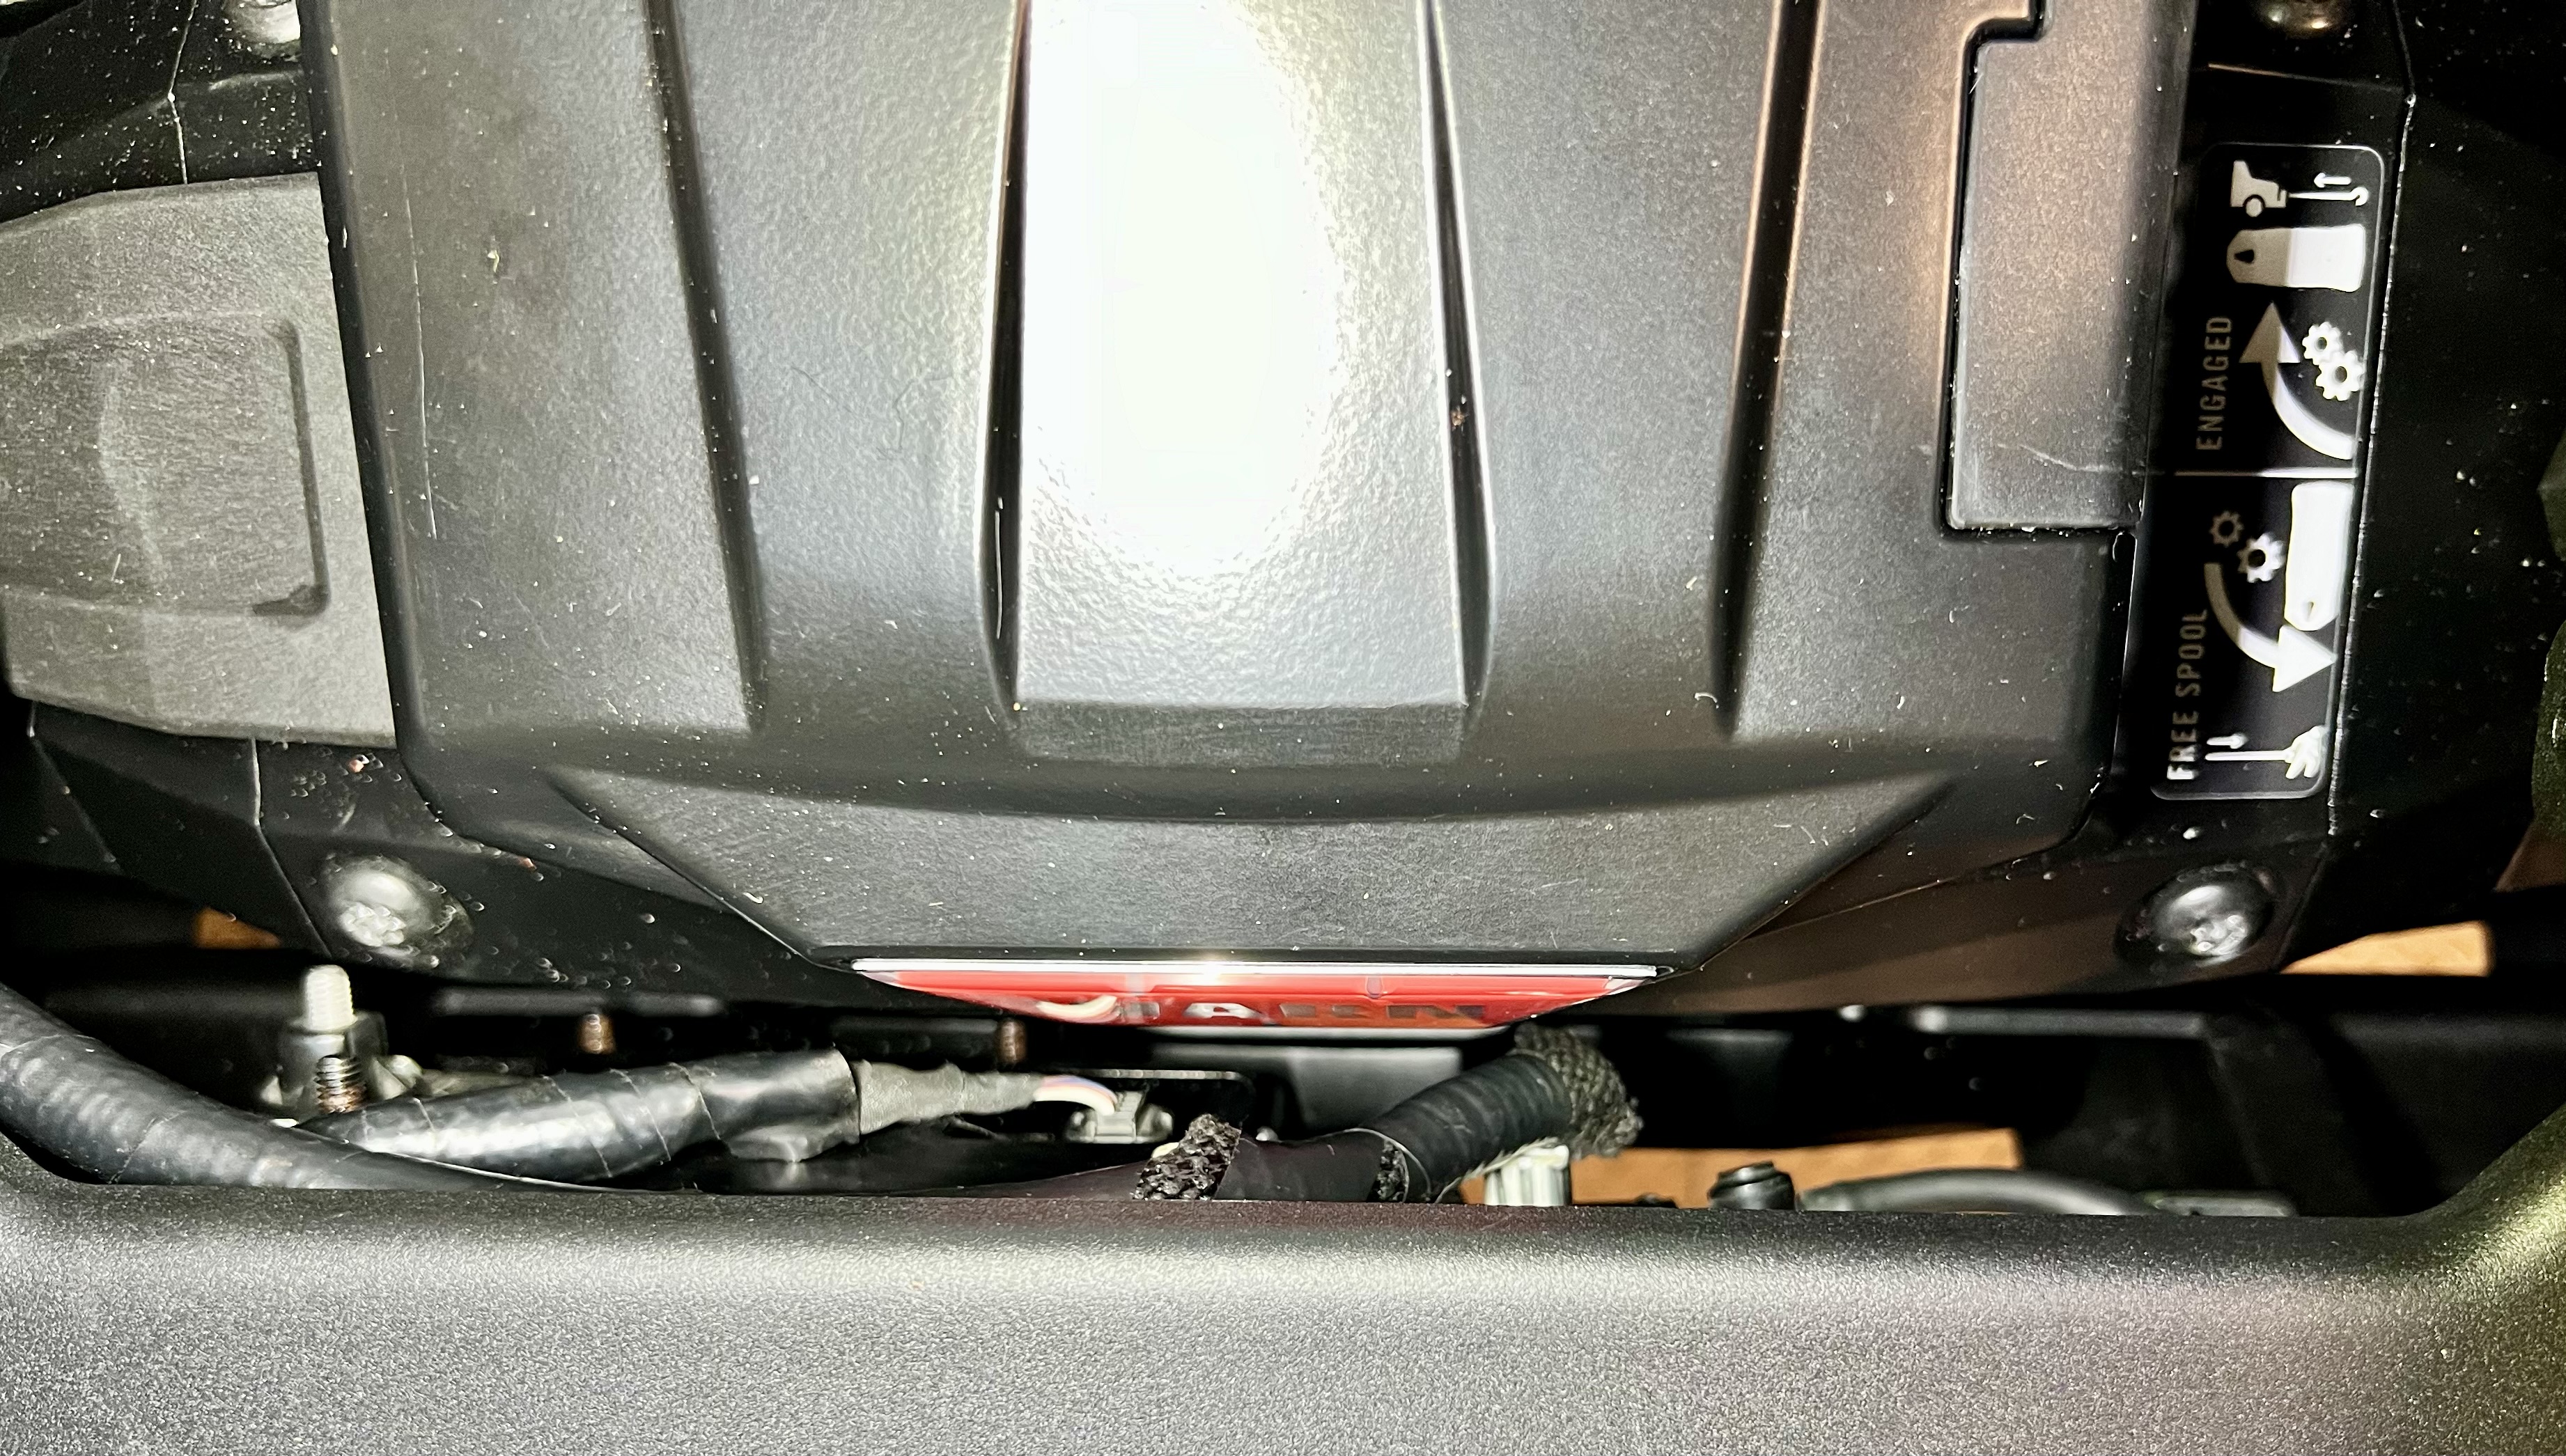
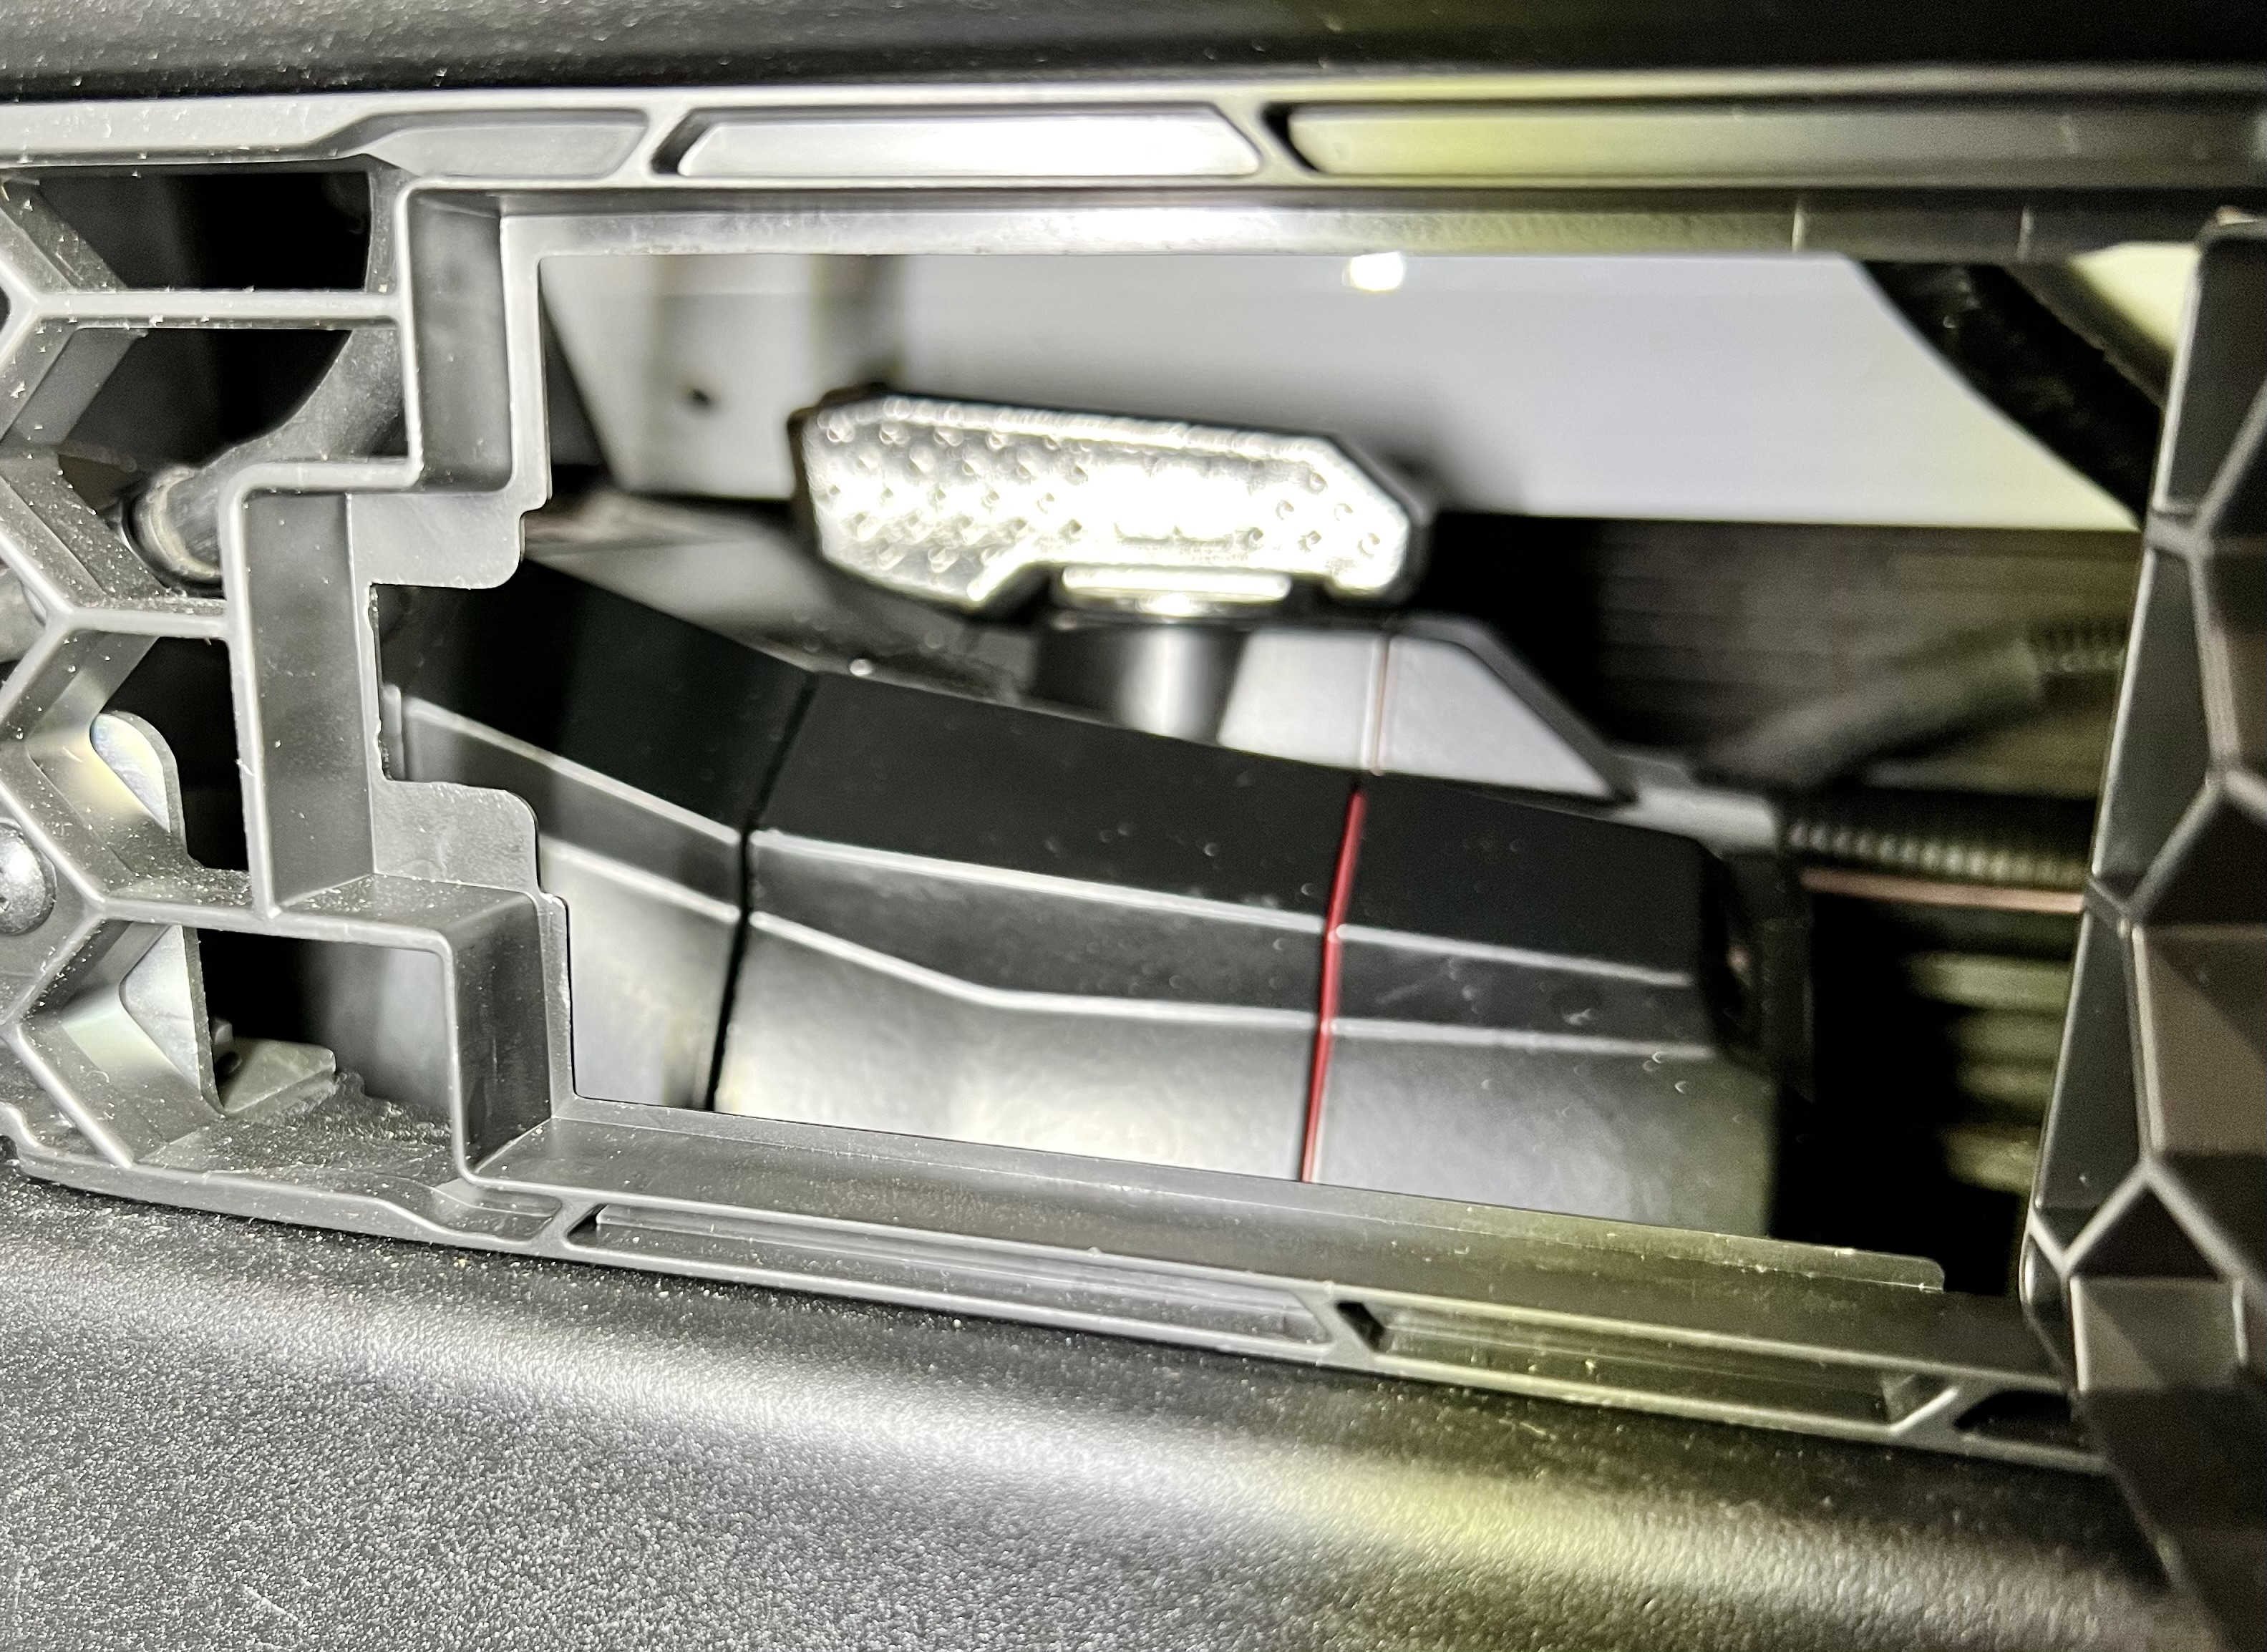
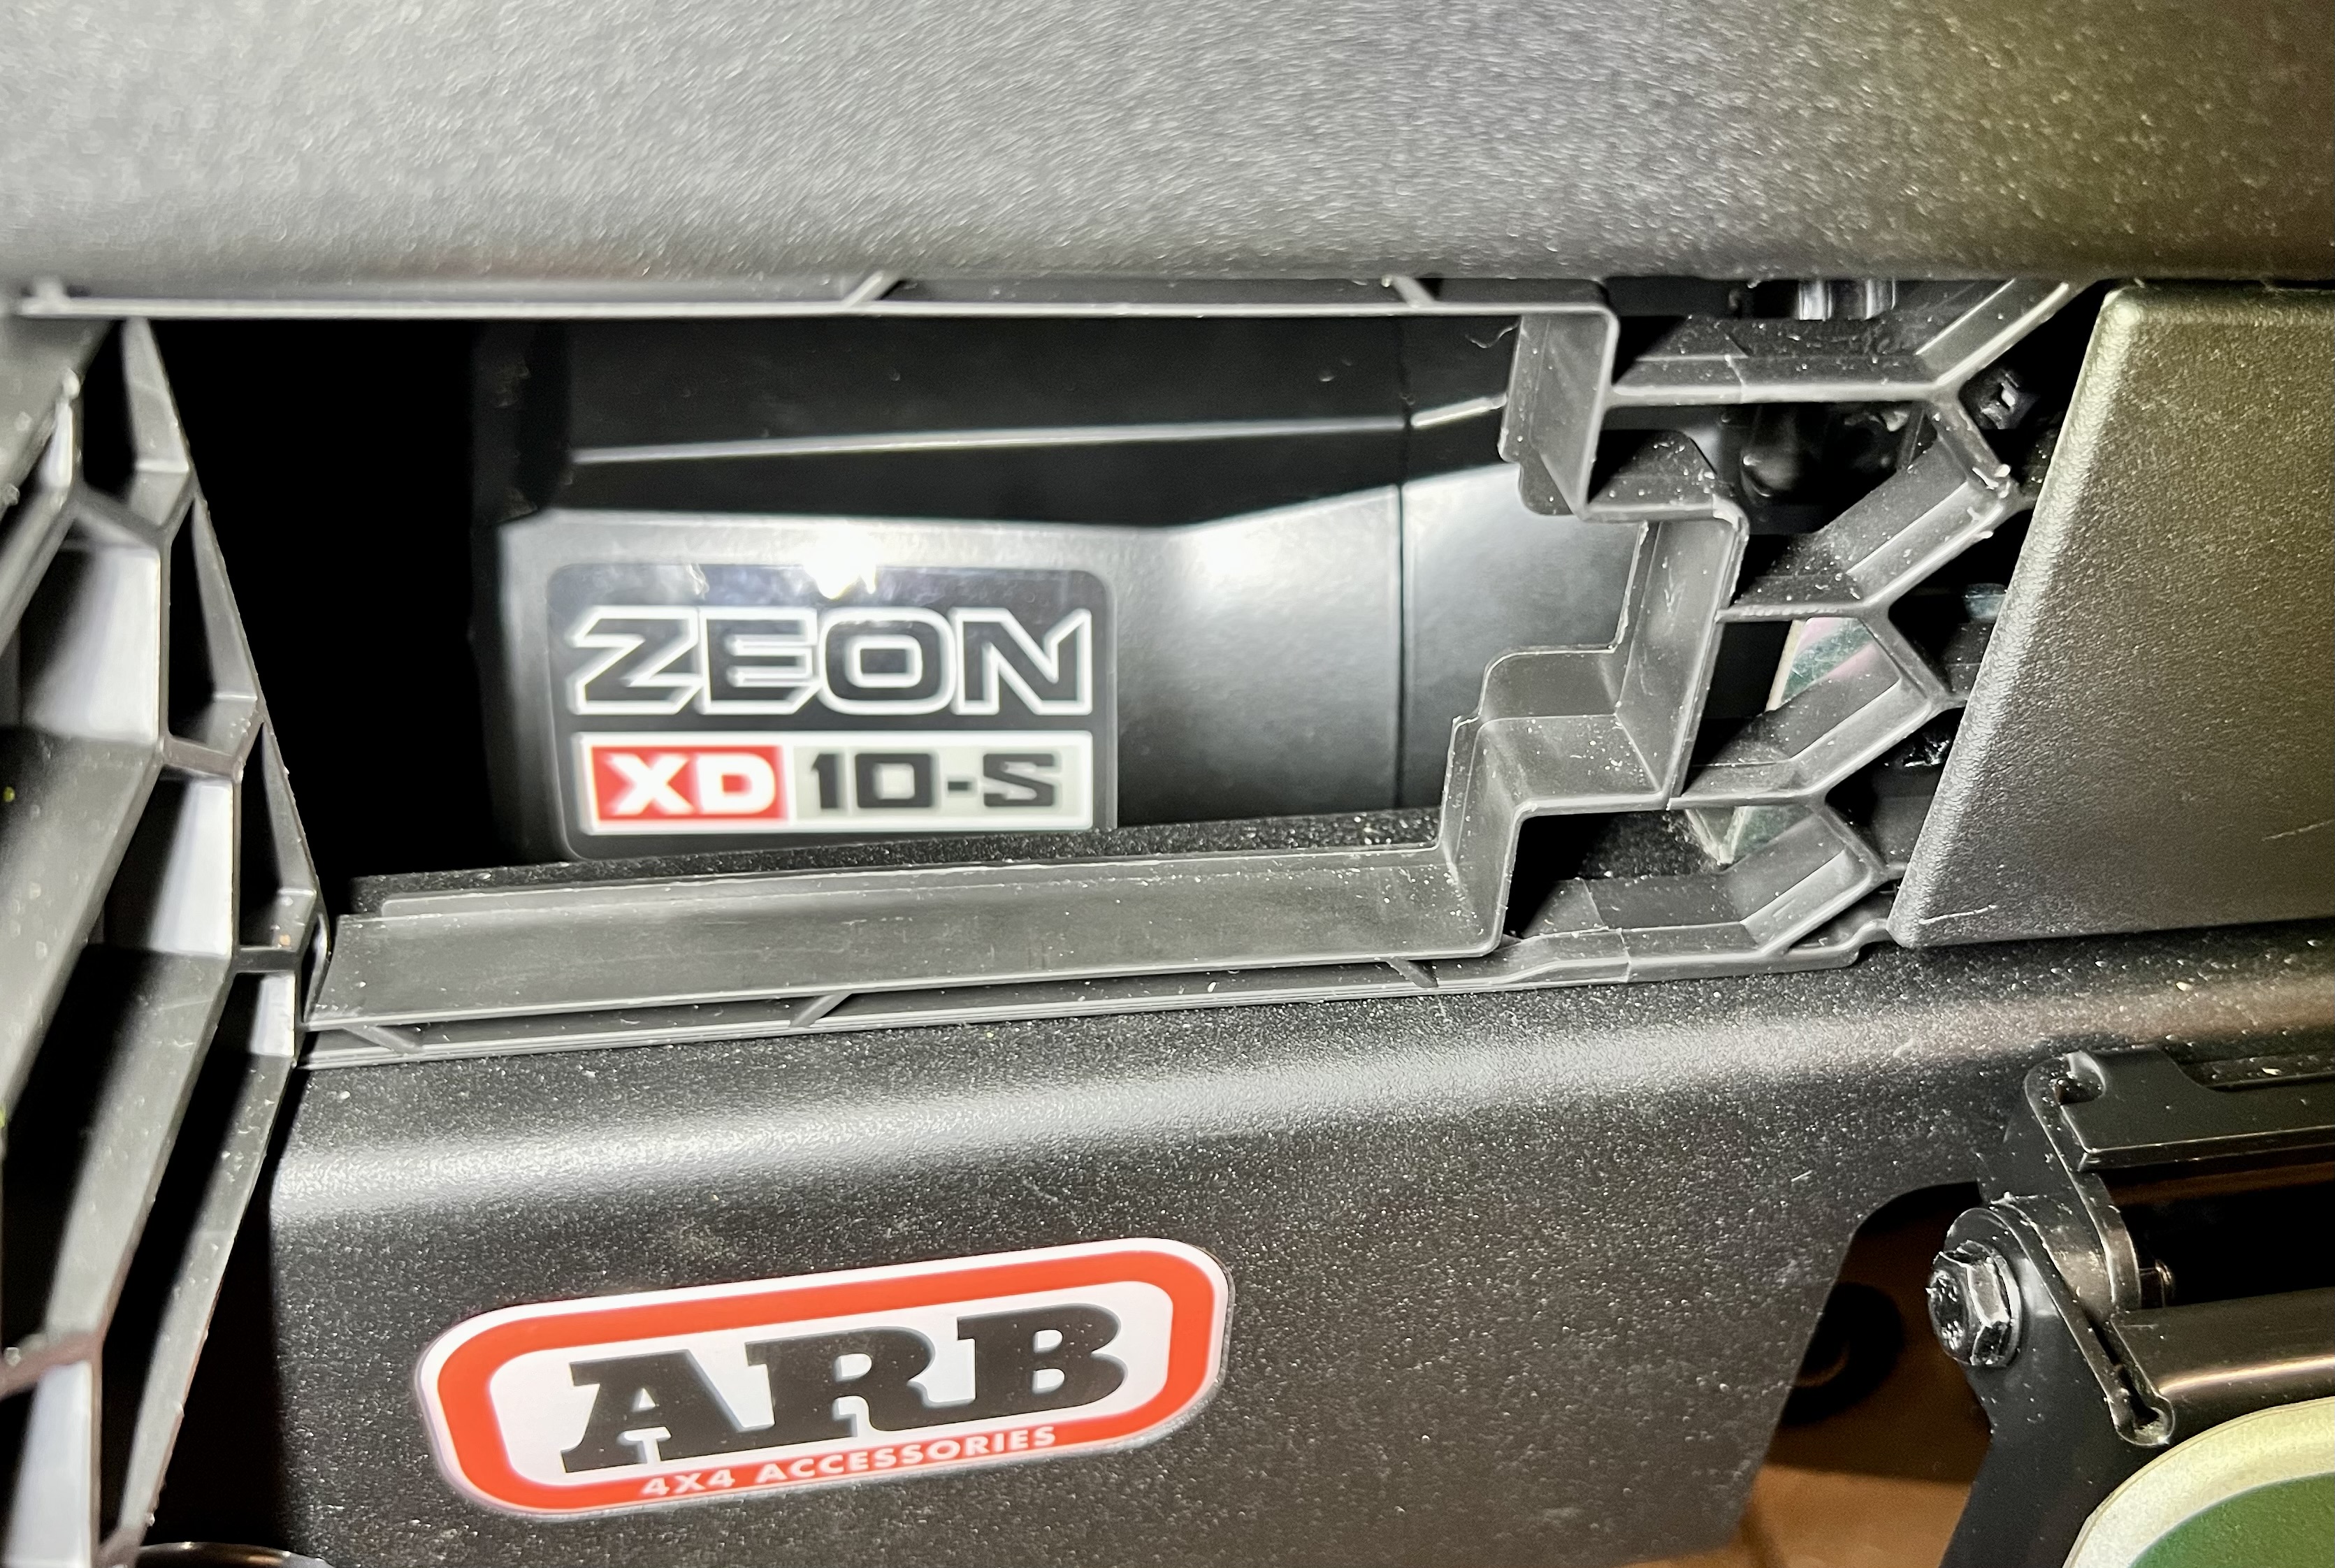
The Warn Zeon winch is a snug, but we think clean fit.

I used 2 of the 4 provided chassis 'packers' aka spacers on each side to get a close fit to front fascia and bumper wings to fenders.

Cheers
Bschurr, Mal

KCsBronco

Aug 23, 2024

#1
Rest of the story - ARB front bumper's underside provides good airflow and a pretty clean finish too. There're actually 3 light steel underside components - 2 wing covers and a center stone shields.
IMG_2403.jpegIMG_2402.jpegIMG_2400.jpeg
We think ARB's front bumper has a classic/functional look. Should note it's added front-end weight too. Last winter, we've added full steel skids & sliders too, so our WildTrak's a hefty Bronco!

To compensate, this past May we installed Eibach's Pro Bronco springs. Today, our Wildtrack is within 1/2" of its OEM ride height, and handles fine. Clearly it's no dragster, but no noticeable changes in MPG, driving or acceleration.
IMG_2399.jpegIMG_2380.jpegIMG_2379.jpeg
Think our front lights pretty cool too. Here's the look with just marker/parking/back lights on with a push on the key fob's unlock button.
IMG_2423.jpeg
ARB's rear bumper's install requires far less assembly. It's also much easier to handle as almost half its weight is in its 2 steel chassis mounting brackets. Don't underestimate the rear bumper's install as I did though - It'll kick butt too!

First off, everything in and 'round Bronco's rear bumper is MUCH dirtier than the front. Yeah, I'll admit frequent off-roading, and essentially no quality time visiting under my rear bumper created this filth.

I mean, the sand, gravel & dust are caked on everything back there!

Also, unlike Bronco's front bumper, there are electrical connections on BOTH left side (like the front) - AND right side of the rear bumper. Also given the dirt, these connectors refuse to separate without 2-hands with hand tool force.

I'll add that re-connecting these 2 rear bumper sensor connections required a thorough cleaning. A small pick and compressed air.worked for me. After hearing the 'Click' confirming good connections, completely covered with electrical tape and zip tied cables securely in place. Start the Bronco and shift into gear - No dash Parking Aid Fault - We're all Good!

Significant task is to frame mount the rear's 2 steel mounting brackets. Grab your heaviest rubber mallet 'cause these brackets are VERY tight fit on Bronco's chassis. I mean - You gotta beat these things like a rented mule!

After 2 hand blisters, I broke out a high-lift floor jack, lifted on each bracket to max height, and still gave 'em a 'mad as hell' beating. Finally, all 5 bolts were lined up. I skipped drilling holes for the 6th both on both sides - IMO that bumper is FIRMLY attached without that 6th bolt..

ARB's relocation of the rear license plate bracket is another - Do Not Underestimate!! Yeah, I know ARB couldn't screw their pretty rear bumper with a gov't tag, so gotta move to spare tire.

Well, I really didn't mind wiring the run from spare tire to behind OEM's right rear interior panel's electrical harness.

IMG_2419.jpeg
IMG_2412.jpeg
IMG_2420.jpeg
IMG_2421.jpeg
IMG_2418.jpeg
But, after all the tag's hardware install & wiring per ARB instructions there was NO light on the tag. So, I began several hours of rewiring and rewiring and rewiring several more times - Still NO light

So, I tested every connection from the OEM wiring harness to ARB's tag light element and discovered ARB's d**m light doesn't work - VERY ANNOYING##!!??..

Here's the picture sent to ARB of me holding my lighted 12V power tester probe that's connected to ARB light's wire at it's back. As you see, the tester light is shining brightly - ARB's light is dark!
IMG_2417.jpeg
ARB says this light is back ordered with NO availability estimate. Gotta assume this light is in very HIGH demand..
Anywho - We're cursing in new bumps!
IMG_2408.jpeg
Cheers
Jakob1972, Bschurr

Trusted and Carefree

Aug 23, 2024

#2
Well done @Kenneth !

I am kicking around this setup (on the front end anyway) and have a couple questions-

It looks like you went with the ARB foglight kit- What is your impression? I was thinking about going with something else in there, but I like things that hook up easy.

Any weirdness with the front camera being lower and off center? I find I use the front camera quite a bit off road- Tire placement when climbing mainly, but Its sure is nice too have. Have you played around with that yet?

I see you cut the trim piece under the grill (per the instructions) to clear the solenoid on the Warn. Do you think there is a good place to relocate the solonoid in the bumper, or with a different solenoid design (like say the boxier one on a Sherpa) you wouldn't have to make the relief cuts? I'm not squeamish about cutting things, but dont want to unless I have too.

About the ride height- You said you put the Eibach springs on before the bumper, but after the skids right? What was that ride height change like? I am wondering if there was more sag from the skids or the bumper. I would guess the bumper, but curious what you though?

I am pretty pleased with the Hoss 3 springs and shocks. I know some folks said the Eibachs were kinda harsh on road- curious what you thought of them.

Sorry for playing twenty questions here, but super interested.

Best,

-J
2023 Wildtrak. "Sometimes you got to get lost, to get found" -J Bronco
Sven, Kenneth

KCsBronco

Aug 23, 2024

#3
Thank you!

We're running Rigid's 4" round SAE fogs inside ARB's fog assembly, and Rigid's 6" round 360 drivers on bumper's topside that nicely drilled for lights. We like Rigid's amber back lighting that match our A-pillar lights and solid build quality.

ARB's bumper top mount rounds are impressive. No back lighting and few hundred bucks more made a difference for us.

Yeah, front camera is couple inches left is an adjustment we'll need to keep in mind. Haven't noticed any change to adaptive cruse.

We didn't consider other winch brands & wanted a clear/close mount on this beefy bumper. That facia trim was the trade-off to installing Warn's relocation kit. I had the relo kit and did a loose install up to the point of drilling new mounting holes in the bumper's top plate. You need a ~9" x 6" surface to relo Warn Zeon's control box, and ARB's top surface is the only nearby option.

I didn't want those new holes in the bumper, and didn't like exposing the winch's drum & rope to weather from above either. I talked to ARB's tech support 'bout relo options and installing their top cover over an installed winch. They said it's really personal choice, but didn't suggest using the cover with a winch installed.

I retured the relo kit and made this winch's tight fit work. Our multitool made the fascia cut like hot butter. It's really something you don't notice unless you'll looking for it.

Here're our ride heights measured from floor to wheel flare's outer edge.

OEM - front 39"
OEM - rear 40"

Full skids & sliders - front 38 1/4" with Tare weight @ 5,400lbs
Full skids & sliders -rear38 3/4"

Eibach Pro springs installed - front 40"
Eibach Pro springs installed - rear 40"

ARB bumpers installed - front 39" Tare weight estimate @ 5,700lbs
ARB bumpers installed - rear 39 1/2"

We like HOSS 3.0 too, and won't replace these shocks until they're worn out. Ride quality's obviously subjective, and we did notice some harshness after installing skids & sliders. That's why I added the Eibachs and ride quality noticeably improved.

Perhaps adding the Eibach's without additional weight would create a different result, but we're totally pleased with these springs. Of course, a complete coil-over up grade is probably in our future, but that should be 40 to 50K miles out.

Hope this helps ya!

Cheers
Mal

Trusted and Carefree

Aug 23, 2024

#4
Awesome. Thanks so much for the follow up.
2023 Wildtrak. "Sometimes you got to get lost, to get found" -J Bronco
Kenneth

Gladesmen

Aug 24, 2024

#5
Great write up, thanks for the pictures. I have been thinking of getting bumpers to move the winch out of the way. The factory winch location works but it sticks way out and likes to drag itself over the rocks. I will need to look into this more as I have been eyeing the body armor bumpers so we will see. Man you do have some large critters up there. Our neck of the woods my dogs are bigger than the white tails - I do have big dogs. We do, however, have a healthy population of Axis that are about muley size. Oh and a ton of hogs.
Bronco Nation 1100. Everglades, Desert Sand
Res: 7/30/20 ordered 1/22/21 reorder 10/15/21 changed to Everglades 3/9/22 schedule 8/29/22 bumped to 9/5; 9/7/22 blend, 9/9 Mods, 9/26/22 completed, 10/7 shipped, 11/3/22 delivery
Deano Bronc, Kenneth

KCsBronco

Aug 24, 2024

#6
Great write up, thanks for the pictures. I have been thinking of getting bumpers to move the winch out of the way. The factory winch location works but it sticks way out and likes to drag itself over the rocks. I will need to look into this more as I have been eyeing the body armor bumpers so we will see. Man you do have some large critters up there. Our neck of the woods my dogs are bigger than the white tails - I do have big dogs. We do, however, have a healthy population of Axis that are about muley size. Oh and a ton of hogs.

Thanks! Yeah, we've lived all over and this place has BY FAR the most intense wildlife presents. Must've been 50-80 elk here yesterday. The caves are very active, fun to watch. Gotta mention this morning, there was a strong 'barnyard' aroma though.

We liked Fab Four & couple other bumper options too, ARB just checked all our boxes. PITA to Install, but totally happy with front bump, couple remaining issues with rear.

I'll try to find a new bulb for the rear's tag light. Also, wasn't able to re-install our mud/rock flaps on rear. Not unique to ARB, these high/open departure rear bumpers really impractical for rear flaps. This clearance is great for clearing trail boulders, but I noticed Bronco's rear corner lower body panels are completely open at their bottoms.

Given the crap that collects there, that open body cavity will quickly fill with sand, gravel, small animals, etc, etc.

Thinking 'bout cutting our old flaps' poly material to rig at least some partial closures back there.

Cheers
Jakob1972, Sven
Moderator

Rank VI

Aug 26, 2024

#7
Thanks! Yeah, we've lived all over and this place has BY FAR the most intense wildlife presents. Must've been 50-80 elk here yesterday. The caves are very active, fun to watch. Gotta mention this morning, there was a strong 'barnyard' aroma though.

We liked Fab Four & couple other bumper options too, ARB just checked all our boxes. PITA to Install, but totally happy with front bump, couple remaining issues with rear.

I'll try to find a new bulb for the rear's tag light. Also, wasn't able to re-install our mud/rock flaps on rear. Not unique to ARB, these high/open departure rear bumpers really impractical for rear flaps. This clearance is great for clearing trail boulders, but I noticed Bronco's rear corner lower body panels are completely open at their bottoms.

Given the crap that collects there, that open body cavity will quickly fill with sand, gravel, small animals, etc, etc.

Thinking 'bout cutting our old flaps' poly material to rig at least some partial closures back there.

Cheers

Very nice setup. Man, that front bumper is beefy but considering you are dealing with Elk, I can see why you picked it.

As far as the rear mud flaps, you could possibly go with Rokblokz. https://rokblokz.com/products/ford-bronco-2021-mud-flaps
They have their own rear mounting bracket so they don't use the bumper as an attachment point. Expensive, but they've worked really well for me.
2022 Bronco Badlands, 4D, Hot Pepper Red, 2.7, Squatch, Lux, and MIC.
7/13/2020 10:04pm reservation. Blend 6/16/2022 Delivered 6/26/2022.
Dealership - Stephen's Auto Center.
Kenneth, Sven

KCsBronco

Aug 26, 2024

#8
Very nice setup. Man, that front bumper is beefy but considering you are dealing with Elk, I can see why you picked it.

As far as the rear mud flaps, you could possibly go with Rokblokz. https://rokblokz.com/products/ford-bronco-2021-mud-flaps
They have their own rear mounting bracket so they don't use the bumper as an attachment point. Expensive, but they've worked really well for me.

Hey thanks for the link - Will check 'em out!

Cheers
Deano Bronc

KCsBronco

Aug 26, 2024

#9
Very nice setup. Man, that front bumper is beefy but considering you are dealing with Elk, I can see why you picked it.

As far as the rear mud flaps, you could possibly go with Rokblokz. https://rokblokz.com/products/ford-bronco-2021-mud-flaps
They have their own rear mounting bracket so they don't use the bumper as an attachment point. Expensive, but they've worked really well for me.

Yes, frame mount, xl long, front & back - Perfect! Mr Deano always has great part suggestions for us. Thank you!

Cheers
Deano Bronc, Sven

KCsBronco

Aug 29, 2024

#10
Here's a front camera update while off-roading a very rocky trail. ARB Summit bumper's camera reposition's just over its license plate bracket, which we can see the top of this bracket at the bottom of Bronco's screen. Also, the camera's a little under 2 inches left of center.

This 2" shift left places Bronco's projected tire positions about a tire's width left of their actual roll. In other words, as we're driving the center of an off-road trail, Bronco's camera shows our position's to the left of center.

So, we drive our Bronco with those tire-biter rocks either directly on or to the left of the front camera's projected wheel position.

Here's an example of poor tire position with that tire-biting pointy rock on the right side of passenger wheel. We need to steer right to avoid those rocks and place our wheels in a clearer line on this trail section.
IMG_2511.jpeg

Cheers
Mr. Clean, Mal

KCsBronco

Sep 01, 2024

#11
Very nice setup. Man, that front bumper is beefy but considering you are dealing with Elk, I can see why you picked it.

As far as the rear mud flaps, you could possibly go with Rokblokz. https://rokblokz.com/products/ford-bronco-2021-mud-flaps
They have their own rear mounting bracket so they don't use the bumper as an attachment point. Expensive, but they've worked really well for me.

Installed Rokblokz mud flaps today - Very impressed! These rock blockers are built trough, and their XL long size offers max protection for both our Bronco & following vehicles. BIG Thanks again for this suggestion!

Rokblokz use several plates & a bunch of fasteners, so each flap's assembly takes 'round 10 - 15 minutes. Their steel brackets fit nicely and provide very secure mounts. The flaps' material are thick somewhat stiff ploy that seem very durable.

We ran Ford's accessory mud flaps with our OEM bumpers that mounted with small screws into the wheel liner's ploy material. Those flaps did an OK job, but IMO Rokblokz's way better. Our Goodyear Territories are rock throwers NO MORE!

Front mounting bracket bolted to chassis' crash member on flap's forward side
IMG_2540.jpegIMG_2541.jpeg
Mounted rear flap's forward side
IMG_2553.jpeg
Rear flap's steel mounting bracket's 2 bolts on OEM chassis/body mount assembly
IMG_2552.jpegIMG_2569.jpeg
Cheers
UserError, Mal

Trusted and Carefree

Sep 03, 2024

#12
Installed Rokblokz mud flaps today - Very impressed! These rock blockers are built trough, and their XL long size offers max protection for both our Bronco & following vehicles. BIG Thanks again for this suggestion!

Rokblokz use several plates & a bunch of fasteners, so each flap's assembly takes 'round 10 - 15 minutes. Their steel brackets fit nicely and provide very secure mounts. The flaps' material are thick somewhat stiff ploy that seem very durable.

We ran Ford's accessory mud flaps with our OEM bumpers that mounted with small screws into the wheel liner's ploy material. Those flaps did an OK job, but IMO Rokblokz's way better. Our Goodyear Territories are rock throwers NO MORE!

Front mounting bracket bolted to chassis' crash member on flap's forward side
IMG_2540.jpegIMG_2541.jpeg
Mounted rear flap's forward side
IMG_2553.jpeg
Rear flap's steel mounting bracket's 2 bolts on OEM chassis/body mount assembly
IMG_2552.jpegIMG_2569.jpeg
Cheers

I run these on my Wildtrak and I think they work really well. Never thought I would spend that kind of money on mud flaps, but here we are :)

Just a quick warning- watch the tightness on the thumb screws that hold them on. My set threw a couple of them until they settled in (took a couple months). If you arent planning on taking them off regularly, you may think about using the allen head screws.
2023 Wildtrak. "Sometimes you got to get lost, to get found" -J Bronco
Deano Bronc, Kenneth

KCsBronco

Sep 03, 2024

#13
I run these on my Wildtrak and I think they work really well. Never thought I would spend that kind of money on mud flaps, but here we are :)

Just a quick warning- watch the tightness on the thumb screws that hold them on. My set threw a couple of them until they settled in (took a couple months). If you arent planning on taking them off regularly, you may think about using the allen head screws.

Hey, thanks for the heads-up!! Just checked & yup - They were loose..

Cheers
UserError, Mal

KCsBronco

Oct 28, 2024

#14
Rest of the story - ARB front bumper's underside provides good airflow and a pretty clean finish too. There're actually 3 light steel underside components - 2 wing covers and a center stone shields.
IMG_2403.jpegIMG_2402.jpegIMG_2400.jpeg
We think ARB's front bumper has a classic/functional look. Should note it's added front-end weight too. Last winter, we've added full steel skids & sliders too, so our WildTrak's a hefty Bronco!

To compensate, this past May we installed Eibach's Pro Bronco springs. Today, our Wildtrack is within 1/2" of its OEM ride height, and handles fine. Clearly it's no dragster, but no noticeable changes in MPG, driving or acceleration.
IMG_2399.jpegIMG_2380.jpegIMG_2379.jpeg
Think our front lights pretty cool too. Here's the look with just marker/parking/back lights on with a push on the key fob's unlock button.
IMG_2423.jpeg
ARB's rear bumper's install requires far less assembly. It's also much easier to handle as almost half its weight is in its 2 steel chassis mounting brackets. Don't underestimate the rear bumper's install as I did though - It'll kick butt too!

First off, everything in and 'round Bronco's rear bumper is MUCH dirtier than the front. Yeah, I'll admit frequent off-roading, and essentially no quality time visiting under my rear bumper created this filth.

I mean, the sand, gravel & dust are caked on everything back there!

Also, unlike Bronco's front bumper, there are electrical connections on BOTH left side (like the front) - AND right side of the rear bumper. Also given the dirt, these connectors refuse to separate without 2-hands with hand tool force.

I'll add that re-connecting these 2 rear bumper sensor connections required a thorough cleaning. A small pick and compressed air.worked for me. After hearing the 'Click' confirming good connections, completely covered with electrical tape and zip tied cables securely in place. Start the Bronco and shift into gear - No dash Parking Aid Fault - We're all Good!

Significant task is to frame mount the rear's 2 steel mounting brackets. Grab your heaviest rubber mallet 'cause these brackets are VERY tight fit on Bronco's chassis. I mean - You gotta beat these things like a rented mule!

After 2 hand blisters, I broke out a high-lift floor jack, lifted on each bracket to max height, and still gave 'em a 'mad as hell' beating. Finally, all 5 bolts were lined up. I skipped drilling holes for the 6th both on both sides - IMO that bumper is FIRMLY attached without that 6th bolt..

ARB's relocation of the rear license plate bracket is another - Do Not Underestimate!! Yeah, I know ARB couldn't screw their pretty rear bumper with a gov't tag, so gotta move to spare tire.

Well, I really didn't mind wiring the run from spare tire to behind OEM's right rear interior panel's electrical harness.

IMG_2419.jpeg
IMG_2412.jpeg
IMG_2420.jpeg
IMG_2421.jpeg
IMG_2418.jpeg
But, after all the tag's hardware install & wiring per ARB instructions there was NO light on the tag. So, I began several hours of rewiring and rewiring and rewiring several more times - Still NO light

So, I tested every connection from the OEM wiring harness to ARB's tag light element and discovered ARB's d**m light doesn't work - VERY ANNOYING##!!??..

Here's the picture sent to ARB of me holding my lighted 12V power tester probe that's connected to ARB light's wire at it's back. As you see, the tester light is shining brightly - ARB's light is dark!
IMG_2417.jpeg
ARB says this light is back ordered with NO availability estimate. Gotta assume this light is in very HIGH demand..
Anywho - We're cursing in new bumps!
IMG_2408.jpeg
Cheers

FINALLY, have a functional licence plate light!! Yeah, since August 22, ARB USA & I have been working what eventually became a heated discussion on their rear bumper's plate light. We received ARB's rear bumper with a dead plate light component. Tech customer service initially told me to simply "change the light's bulb".

Well, that was impossible as it's a 2 element LED light - there ain't no bulb!!

The last week of August and 1st week of September, we had couple phone calls and several emails. ARB agreed to replace the dead light, but said shipping from Australia would take months, so maybe we'd have their replacement sometime next year. Clearly, that dog wouldn't hunt!

By Mid-September, I was pointing out ARBUSA.com had these rear bumper's in stock, and why couldn't they simply pull a light element from one of their stock bumpers. Initially, the customer service say he'd go find us a light, but for 4 weeks, that didn't happen.

They did finally agree to send us a light taken from a stock bumper - About a week after I filed a complaint with BBB. Also, told ARB's tech customer service rep of my phone call with NHTSA analyst who suggested filing a complaint with them too.

We received the replacement plate light yesterday, I installed today - It's working fine. So, I've closed our BBB complaint, and won't file with NHTSA.

While we do believe ARB builds very solid bumpers, this plate light issue has been a real PITA for us .. Perhaps forced ARB USA's mgmt to pull their head from the same orifice
IMG_3514.jpeg
Cheers
Mr. Clean, Deano Bronc

You must log in or register to post here.